Spring 系列生态-Spring AOP,Spring Data JPA, Spring Batch,Spring Cloud, Spring Security
Spring框架,Java领域流行的轻量级开源框架,以其模块化、松耦合的设计和强大的依赖注入、面向切面编程能力著称。在.Net 中 也提供了这些开源框架,但是没有形成统一的体系框架
1. Spring框架概述与核心依赖注入(DI)
Spring框架的诞生与发展
Spring框架自2003年问世以来,一直是Java开发者首选的轻量级企业级应用开发框架。其最初由Rod Johnson创立并发表于《Expert One-to-One J2EE Design and Development》一书中,旨在解决传统企业应用开发中的复杂性问题。经过多年的发展,Spring逐渐演变成了一个全面的编程和配置模型,不仅支持众多的Java功能,还支持云计算、大数据等现代软件开发的需求。
Spring框架的核心价值与优势
Spring框架的核心价值在于其非侵入式编程模型和依赖注入(DI)机制,降低了对象间的耦合度,提高了系统的可测试性和模块化。Spring的一个主要优势是通过IoC容器管理对象的生命周期和配置,它允许开发者专注于业务逻辑,而非繁琐的配置和初始化代码。此外,Spring提供了丰富的编程和配置模型,支持多种数据访问技术,强化了事务管理,并提供了对RESTful Web Services的全面支持。
依赖注入(DI)的设计理念
依赖注入(Dependency Injection, DI)是一种设计模式,它允许创建对象的外部资源的控制权传递给对象。这种模式的出现是对传统的“new”操作符创建对象方法的改进,它鼓励松耦合和更好的代码组织。在Spring中,依赖注入的核心是通过IoC(控制反转)容器来实现的,容器会根据配置,将被依赖对象注入到需要它们的对象中。
依赖注入的实现方式与应用场景
依赖注入主要有两种方式:构造器注入和设值注入。构造器注入是在创建对象时通过构造函数强制提供依赖项,而设值注入是通过对象的setter方法注入依赖项。选择哪种方式取决于具体的应用场景和开发者的偏好。通常,构造器注入用于必需的依赖,而设值注入用于可选的依赖。依赖注入可以应用于许多场景,比如服务层组件的构造、测试时替换依赖以实现mock对象,或者在Spring MVC中注入控制器层的依赖。
2. Spring AOP(面向切面编程)
Spring AOP 可以通过在方法执行前后插入额外的功能来增强业务逻辑,常用于日志记录、性能监控、安全控制等场景。
基本概念
- 切面(Aspect):切面是一个关注点的模块化,包含了横切关注点的功能代码,比如日志、安全等。
- 连接点(JoinPoint):程序执行的某个点,比如方法调用。
- 通知(Advice):定义在切面中,指定在连接点处执行的操作。通知有多种类型,包括
@Before、@After、@Around等。 - 切入点(Pointcut):指示在什么地方应用通知。通常是通过表达式定义的。
- 织入(Weaving):将通知应用到目标对象的过程
Spring AOP 示例
1. 使用 Maven 构建,首先要在 pom.xml 中添加 AOP 相关的依赖:
<dependency>
    <groupId>org.springframework.boot</groupId>
    <artifactId>spring-boot-starter-aop</artifactId>
</dependency>
2. 创建目标接口
@RestController
@RequestMapping("/aop")
public class AOPController {

    @GetMapping("/test")
    public String test() {
        System.out.println("Hello, AOP!");
        return "Hello, AOP!";
    }
}
3. 创建切面(Aspect)
package com.example.springbootdemo.aop;

import org.aspectj.lang.annotation.*;
import org.springframework.stereotype.Component;

@Component
@Aspect
public class LoggingAspect {

    // 定义一个切入点,匹配 AOPController 中所有的方法
    @Pointcut("execution(* com.example.springbootdemo.controller.AOPController.*(..))")
    public void myServiceMethods() {}

    // 在方法执行前执行
    @Before("myServiceMethods()")
    public void logBefore() {
        System.out.println("Before method execution");
        /* // 假设有一个方法来获取当前用户信息
         User currentUser = getCurrentUser();
        // 检查是否有足够的权限
        if (!hasPermission(currentUser, "TRANSFER_MONEY")) {
            throw new UnauthorizedException("User does not have permission to transfer money.");
        }*/
    }

    // 在方法执行后执行
    @After("myServiceMethods()")
    public void logAfter() {
        System.out.println("After method execution");
    }

    // 在方法正常返回后执行
    @AfterReturning("myServiceMethods()")
    public void logAfterReturning() {
        System.out.println("AfterReturning method execution");
    }

    // 在方法抛出异常后执行
    @AfterThrowing("myServiceMethods()")
    public void logAfterThrowing() {
        System.out.println("AfterThrowing method execution");
    }

    // 环绕通知(既可以在方法前后执行,也可以控制方法是否执行)
    @Around("myServiceMethods()")
    public Object logAround(org.aspectj.lang.ProceedingJoinPoint joinPoint) throws Throwable {
        long start = System.currentTimeMillis();

        // 执行目标方法
        Object result = joinPoint.proceed();

        long end = System.currentTimeMillis();
        System.out.println("Execution time: " + (end - start) + " ms");

        return result;
    }
}
Pointcut:定义了一个切入点,表示我们要拦截 com.example.springbootdemo.controller.AOPController 包中的所有方法。
Before:在目标方法执行之前执行, 比如权限检查、参数校验等。
After:在目标方法执行之后执行,例如更新审计日志。
AfterReturning: 在方法正常返回后执行.
Around:环绕通知,方法执行前后都可以增强,并且能够控制是否执行目标方法, 灵活性较强。
AfterThrowing: 在方法抛出异常后执行
表达式解析:
切点表达式execution(* com.example.springbootdemo.controller.AOPController.*(..)) 用来标记目标方法的执行点,基于 AspectJ 的表达式语言,它用来匹配符合特定条件的方法。这里的表达式含义可以分解为以下几个部分:
1. execution(...):表示匹配方法执行的连接点(JoinPoint)。execution 是 AspectJ 的一个关键字,用于描述方法执行的切点。

2. *:星号(*)表示 任意返回类型。也就是说,这个切点可以匹配任何返回类型的方法,不论它是 void、int 还是其他类型。例如:

execution(void com.example.service.MyService.*(..)):只匹配返回类型是 void 的方法。
execution(String com.example.service.MyService.*(..)):只匹配返回类型是 String 的方法。

3. com.example.springbootdemo.controller.AOPController:这是 目标类的完全限定名,表示这个切点只会匹配 com.example.springbootdemo.controller.AOPController 类中的方法。

4. *:第二个星号表示 方法名。这意味着匹配 AOPController类中的 任意方法,不管方法名是什么。也可以指定具体的名称来限制只匹配某些方法。例如:

execution(* com.example.service.MyService.process(..)):只匹配 process 方法。
execution(* com.example.service.MyService.*(..)):匹配该类中所有方法。

5. (..):这是 参数列表的匹配,(..) 表示 任意数量和类型的参数,包括零个参数。它可以匹配任意方法的参数列表。

execution(* com.example.service.MyService.*(String)):只匹配接收一个 String 类型参数的方法。
execution(* com.example.service.MyService.*(..)):匹配接收任意参数数量和类型的方法。
所以这里表达式 execution(* com.example.springbootdemo.controller.AOPController.*(..)) 表示匹配 com.example.springbootdemo.controller.AOPController 类中,方法名任意、返回类型任意、参数类型任意的方法。
3. Spring Data JPA
基础概念
jpa 的全称是 Java Persistence API ,ORM 框架中的一种,相当于提供了Dao 层的 持久层API ,不需要我们自己去写持久层,简化了与数据库交互的过程。会根据接口定义的名称自动生成代码,具体接口定义的方式参考这里。
和Mybatis plus 一样都属于ORM框架,JPA可以减少持久层代码开发,开发效率高,但是更适用简单项目快速开发。Mybatis plus 可以更灵活直接操作SQL,对复杂性和较性能要求比较高的系统比较适用
JPA示例
1. 首先要在 pom.xml 中添加 JPA相关的依赖:
        <dependency>
            <groupId>org.springframework.boot</groupId>
            <artifactId>spring-boot-starter-data-jpa</artifactId>
        </dependency>
        <!-- (可选)我这里可能是spring boot版本和jpa不兼容,需要添加hibernate-core依赖,并且版本号也要兼容,否则就会报错 -->
        <dependency>
            <groupId>org.hibernate</groupId>
            <artifactId>hibernate-core</artifactId>
            <version>6.1.5.Final</version>
        </dependency>
2. 添加测试类,需要@Entity标识,和无参构造函数。这里可以指定映射的数据库表名和列信息等
@Getter
@Setter
@Entity
//@Table(name = "tb_animal")
public class Animal {
    public Animal() {}
    @Id
    @GeneratedValue(strategy = GenerationType.IDENTITY)
    private Long id;
    //@Column(name = "animalName", nullable = false, length = 50)
    private String name;
    private int age;


// 构造函数、getter和setter方法省略
    // 其他方法...
}
3. 创建Repository仓储,继承 JpaRepository ,我这里需要动态查询,所以还继承了 JpaSpecificationExecutor 。JPA会根据方法名称关键字自动生成相应sql实现,不需要我们自己去创建,具体可以参考官方。继承 JpaRepository 之后已经提供了基础的CRUD操作方法,这里可以写一些自定义的方法,并且也可以自定义SQL。
public interface AnimalRepository extends JpaRepository<Animal, Long> ,JpaSpecificationExecutor<Animal>{

    //根据名字查找动物
    @Lock(LockModeType.READ)
    Animal findByName(String name);
    //根据年龄查找动物
    List<Animal> findByAge(Integer age);
    //根据年龄和名字查找动物
    @Query("SELECT a FROM Animal a WHERE a.age = :age AND a.name = :name")
    List<Animal> findListByCustomQuery(Integer age, String name);
    //根据年龄大于某个值查找动物
    List<Animal> findByAgeGreaterThan(int age);
    @Transactional(timeout = 30)
    @Query("Update Animal set age = ?1 where name = ?2")
    Boolean UpdateAnimal(Integer age, String name);
}
4. 添加application.yaml 配置
spring:
  application:
    name: SpringBootDemo
  datasource:
    url: jdbc:mysql://localhost:3306/hello?useUnicode=true&characterEncoding=utf8&useSSL=false&useLegacyDatetimeCode=false
    username: root
    password: hua3182486
    driver-class-name: com.mysql.cj.jdbc.Driver
  jpa:
    show-sql: true #控制台打印最终的sql语句,方便开发时查看生成的sql语句是否正确
      #generate-ddl: true
    hibernate:
      ddl-auto: update
      #update:该配置比较常用,当服务首次启动会在数据库中生成相应表,后续启动服务时如果实体类有增加属性会在数据中添加相应字段,原来数据仍在保留
      #create :该值慎用,每次重启项目的时候都会删除表结构,重新生成,原来数据会丢失不见。
      #create-drop :慎用,当项目关闭,数据库中的表会被删掉。
      #validate : 验证数据库和实体类的属性是否匹配,不匹配将会报错。
    properties:
      hibernate.format_sql: true #格式化sql语句
      hibernate.dialect: org.hibernate.dialect.MySQL5Dialect #数据库方言,要和数据库匹配
5. 到这里就弄好了,接下来添加自己的测试服务类,api接口
@Service
public class AnimalService {
    @Autowired
    private AnimalRepository animalRepository;
    //根据名字查询
    public Animal getAnimalByName(String name) {
        return animalRepository.findByName(name);
    }
    //根据id查询
    public Animal getAnimalById(Long id)
    {
        return animalRepository.findById(id).orElse(null);
    }

    //新增 or 更新
    public Animal saveAnimal(Animal animal) {
        return animalRepository.save(animal);
    }
    //删除
    public void deleteAnimal(Long id) {
        animalRepository.deleteById(id);
    }
    //动态查询
    public List<Animal> getAllUsers(Integer age) {
        //使用Specification 进行动态查询
        Specification<Animal> spec = Specification.where(null);
        if (age!= null) {
            //root 代表查询的根实体对象,在这里它是 Animal 实体的映射
            //query 是 CriteriaQuery 的实例,表示实际的查询对象。通常不需要在简单的条件构造中使用它,但是它在处理复杂查询时是非常重要的。例如,在某些情况下,可能需要访问查询的排序、分组或其他信息。
            //criteriaBuilder 是 CriteriaBuilder 对象,它用于构造查询的条件,可以使用类似于 SQL 的方法来构造各种条件、表达式和运算符。
            spec = spec.and((root, query, criteriaBuilder) ->
                    criteriaBuilder.equal(root.get("age"), age)
            );
        }
        return animalRepository.findAll(spec);
    }
    //自定义查询
    public List<Animal> findListByCustomQuery(Integer age, String name) {
        return animalRepository.findListByCustomQuery( age, name);
    }
    //自定义查询
    public List<Animal> findByAgeGreaterThan(Integer age) {
        return animalRepository.findByAgeGreaterThan( age);
    }
    //分页查询
    public Page<Animal> findListPageable(Integer age, String name) {
        //root 代表查询的根实体对象,在这里它是 Animal 实体的映射
        //query 是 CriteriaQuery 的实例,表示实际的查询对象。通常不需要在简单的条件构造中使用它,但是它在处理复杂查询时是非常重要的。例如,在某些情况下,可能需要访问查询的排序、分组或其他信息。
        //criteriaBuilder 是 CriteriaBuilder 对象,它用于构造查询的条件,可以使用类似于 SQL 的方法来构造各种条件、表达式和运算符。
        Specification<Animal> spec = (root, query, criteriaBuilder) ->
        {
            Predicate predicate = criteriaBuilder.conjunction(); // 没有条件时返回总是为 true 的条件
            if (age!= null) {
                predicate  = criteriaBuilder.and(predicate, criteriaBuilder.greaterThan(root.get("age"), age));
            }
            // 如果 name 不为 null,则添加 name 过滤条件
            if (name != null && !name.isEmpty()) {
                predicate  = criteriaBuilder.and(predicate, criteriaBuilder.like(root.get("name"), "%" + name + "%"));
            }
            return  predicate;
        };
        Sort sort = Sort.by(Sort.Direction.DESC, "age")
                   .and(Sort.by(Sort.Direction.ASC, "name"));
        Pageable pageable = PageRequest.of(0, 3).withSort(sort);
        return animalRepository.findAll(spec,pageable);
    }
}
@RestController
@RequestMapping("/data")
public class DataController {
    @Autowired
    private AnimalService animalService;
    @GetMapping(value="/getAnimalByName",produces="application/json;charset=utf-8")
    public Animal getAnimalByName(String name)
    {
        return animalService.getAnimalByName(name);
    }
    @GetMapping(value="/getAllUsers",produces="application/json;charset=utf-8")
    public List<Animal> getAllUsers(Integer age)
    {
        return animalService.getAllUsers(age);
    }
    @GetMapping(value="/findByAge",produces="application/json;charset=utf-8")
    public List<Animal> findByAge(Integer age)
    {
        return animalService.findByAgeGreaterThan(age);
    }
    @GetMapping(value="/findListByCustomQuery",produces="application/json;charset=utf-8")
    public List<Animal> findListByCustomQuery(Integer age, String name)
    {
        return animalService.findListByCustomQuery(age,name);
    }
    @GetMapping(value="/getAnimalById",produces="application/json;charset=utf-8")
    public Animal getAnimalById(Long id)
    {
        return animalService.getAnimalById(id);
    }
    @PostMapping(value="/saveAnimal",produces="application/json;charset=utf-8")
    public Animal saveAnimal(@RequestBody Animal animal)
    {
        return animalService.saveAnimal(animal);
    }
    @GetMapping(value="/deleteAnimal",produces="application/json;charset=utf-8")
    public Boolean deleteAnimal(Long id)
    {
        animalService.deleteAnimal(id);
        return true;
    }
    @GetMapping(value="/PageList",produces="application/json;charset=utf-8")
    public Page<Animal> PageList(@RequestParam(value = "age", required = false) Integer age,@RequestParam(value = "name", required = false) String name)
    {
        return animalService.findListPageable(age,name);
    }

}
4. Spring Batch
Spring Batch是一个开源的批处理框架,旨在帮助企业建立健壮、高效的批处理应用
功能特点:
提供了大量可重用的组件,包括日志、追踪、事务、任务作业统计、任务重启、跳过、重复、资源管理等。
支持大数据量和高性能的批处理任务,提供了高级功能和特性来支持,比如分区功能、远程功能。
可以与Spring的其他组件无缝集成,如Spring Boot、Spring Data等。
核心概念:
Job:批处理任务的最高级别的抽象,包含了多个Step,每个Step执行一个具体的任务。
Step:具体的任务,包含了一个ItemReader、一个ItemProcessor(可选)和一个ItemWriter。
ItemReader:用于读取数据。
ItemWriter:用于写入数据。
ItemProcessor:用于处理数据,将ItemReader读取的数据转换为需要的形式,然后传递给ItemWriter写入。
JobRepository:负责维护作业的状态、各种处理指标,如开始时间、结束时间、状态、读写次数等。
JobLauncher:负责作业的执行,调用execute方法,验证重启作业是否有效,决定如何执行作业(当前线程、线程池),验证参数等。
使用示例
实现一个读取csv文件,并将读取到的内容写入数据库中
1. 首先要在 pom.xml 中添加 batch相关的依赖:
        <dependency>
            <groupId>org.springframework.boot</groupId>
            <artifactId>spring-boot-starter-batch</artifactId>
        </dependency>
2. 添加批处理配置类
@Configuration
@EnableBatchProcessing
public class BatchConfig {

    @Autowired
    private JobRepository jobRepository;
    @Autowired
    private PlatformTransactionManager transactionManager;
    @Autowired
    private DataSource dataSource;

    // 定义 Job
    @Bean
    public Job importUserJob(Step step1) {
        return new JobBuilder("importUserJob", jobRepository)
                .incrementer(new RunIdIncrementer()) // 允许任务重复执行
                .start(step1)
                .build();
    }

    // 定义 Step
    @Bean
    public Step step1() {
        return new StepBuilder("step1", jobRepository)
                .<BUser, BUserEntity>chunk(100, transactionManager) // 每处理100条数据后提交事务
                .reader(new MyItemReader())
                .processor(processor())
                .writer(uwriter(dataSource))
                .allowStartIfComplete(true)  // 确保允许步骤重启
                .build();
    }

    // 1. Reader:从 CSV 读取数据
    //业务分离在MyItemRearder中,也可以写在这里
/*    @Bean
    public FlatFileItemReader<BUser> reader() {
        return new FlatFileItemReaderBuilder<BUser>()
                .name("userReader")
                .resource(new ClassPathResource("users.csv")) // CSV 文件路径,注意这里文件一定要放在/src/main/resource路径下
                .delimited()
                .names("name", "age", "email") // CSV 列名
                .targetType(BUser.class) // 映射到 User 对象
                .linesToSkip(1)  // 跳过第一行(表头)
                .build();
    }*/
    // 2. 定义 Processor,处理reader读取的数据
    @Bean
    public ItemProcessor<BUser, BUserEntity> processor() {
        return new MyItemProcessor(); // 注入 UserProcessor 实例
    }

    // 3. 定义 Writer,将处理后的数据写入数据库
    @Bean
    public JdbcBatchItemWriter<BUserEntity> uwriter(DataSource dataSource) {
        return new JdbcBatchItemWriterBuilder<BUserEntity>()
                .itemSqlParameterSourceProvider(new BeanPropertyItemSqlParameterSourceProvider<>())
                .sql("INSERT INTO user (name, age, email) VALUES (:name, :age, :email)")
                .dataSource(dataSource)
                .build();
    }
}
3. 添加 MyItemReader (读取文件), MyItemProcessor(处理数据),MyItemWriter (写入数据,这里没有创建,换了一种方式写在了上面BatchConfig 中)
// 自定义 ItemReader 类
public class MyItemReader implements ItemReader<BUser> {

    private FlatFileItemReader<BUser> reader;

    public MyItemReader() {
        reader = new FlatFileItemReader<>();
        reader.setResource(new ClassPathResource("users.csv"));

        final String[] columnNames;
        try {
            columnNames = readHeader(new ClassPathResource("users.csv"));
        } catch (IOException e) {
            // 可以根据实际情况进行日志记录或者其他处理
            System.err.println("读取 CSV 文件表头时发生错误: " + e.getMessage());
            // 这里也可以考虑抛出一个自定义异常,以便上层调用者处理
            throw new RuntimeException("读取 CSV 文件表头失败", e);
        }

        // 设置行映射器
        reader.setLineMapper(new DefaultLineMapper<BUser>() {{
            // 使用 DelimitedLineTokenizer 并设置从表头获取列名
            DelimitedLineTokenizer tokenizer = new DelimitedLineTokenizer();
            tokenizer.setNames(columnNames); // 不手动设置列名,自动从表头读取
            tokenizer.setStrict(false);

            // 设置映射器,将字段映射到 BUser 类的属性
            BeanWrapperFieldSetMapper<BUser> fieldSetMapper = new BeanWrapperFieldSetMapper<>();
            fieldSetMapper.setTargetType(BUser.class);

            setLineTokenizer(tokenizer);
            setFieldSetMapper(fieldSetMapper);
        }});

        reader.setLinesToSkip(1); // 跳过第一行(表头)
        try {
            reader.open(new org.springframework.batch.item.ExecutionContext());
        } catch (Exception e) {
            throw new RuntimeException("初始化 ItemReader 失败", e);
        }
    }

    private String[] readHeader(ClassPathResource resource) throws IOException {
        try (BufferedReader reader = new BufferedReader(new InputStreamReader(resource.getInputStream()))) {
            String headerLine = reader.readLine();
            return headerLine.split(",");
        }
    }

    @Override
    public BUser read() throws Exception {
        return reader.read();
    }
}
public class MyItemProcessor implements ItemProcessor<BUser, BUserEntity> {
    @Override
    public BUserEntity process(BUser user) {
        BUserEntity entity = new BUserEntity();
        entity.setName(user.getName().toUpperCase());
        entity.setAge(user.getAge());
        entity.setEmail(user.getEmail());
        return entity;
    }
}
4. 添加测试项


age,name,email
30,John,[email protected]
25,Jane,[email protected]
28,Bob,[email protected]
@lombok.Data
public class BUser {
    private String name;
    private Integer age;
    private String email;
}

@lombok.Data
public class BUserEntity {
    private Long id;
    private String name;
    private Integer age;
    private String email;
}
@RestController
@RequestMapping("/BatchJob")
public class BatchJobExecutorController {
    @Autowired
    private JobLauncher jobLauncher;

    @Autowired
    private Job importUserJob;

    @GetMapping("/executeJob")
    public void executeJob() {
        try {
            JobExecution execution = jobLauncher.run(importUserJob, new JobParameters());
            System.out.println("Job Status: " + execution.getStatus());
        } catch (Exception e) {
            e.printStackTrace();
        }
    }
}
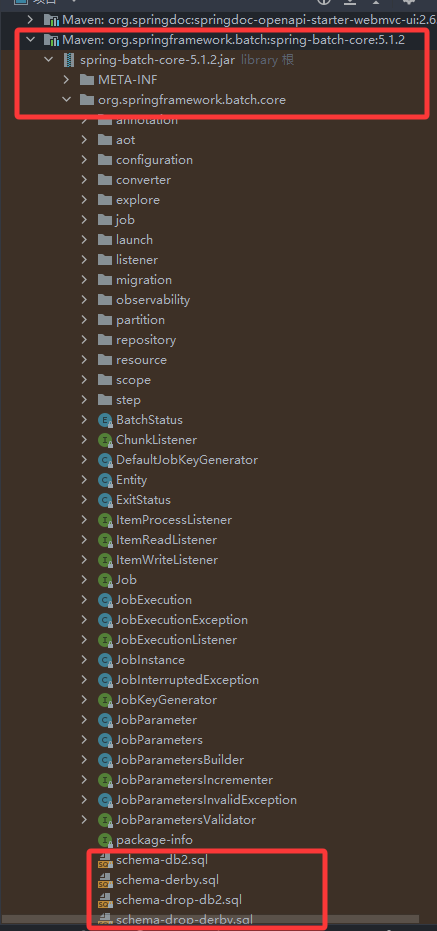
注意:spring batch 会自动生成数据库表,可以自动生成
自动生成:在 application.properties 或 application.yml 中添加:
spring.batch.jdbc.initialize-schema=alwaysy
手动生成:再引用的包里面,找到对应的schema-*.sql 文件,我这里数据库是mysql ,所以直接找到schema-mysql.sql ,
5. Spring Cloud
Spring Cloud 是一个用于构建分布式系统的工具集,它基于 Spring Boot 提供了微服务架构的支持。Spring Cloud 提供了诸如服务发现、配置管理、负载均衡、断路器等微服务相关的功能。
完整的 Spring Cloud 示例,包含以下组件:
-
Eureka Server:服务注册与发现中心。
-
Config Server:集中化的配置管理。
-
Service A:一个简单的微服务,注册到 Eureka Server。
-
Service B:另一个微服务,调用 Service A 并通过 Config Server 获取配置。
- Service C:一个简单的微服务,注册到 Eureka Server.
-
Gateway:API 网关,统一处理外部请求。
1. 创建 Eureka Server
1.1 创建 Spring Boot 项目
使用 Spring Initializr 创建一个 Spring Boot 项目,添加 Eureka Server 依赖。(使用Spring Initializr 创建项目的时候,可以直接选择依赖进行初始化项目,不需要手动引用以下包)
        <dependency>
            <groupId>org.springframework.boot</groupId>
            <artifactId>spring-boot-starter-web</artifactId>
        </dependency>
        <dependency>
            <groupId>org.springframework.cloud</groupId>
            <artifactId>spring-cloud-config-server</artifactId>
        </dependency>

        <dependency>
            <groupId>org.springframework.boot</groupId>
            <artifactId>spring-boot-starter-test</artifactId>
            <scope>test</scope>
        </dependency>

        <dependency>
            <groupId>org.springframework.cloud</groupId>
            <artifactId>spring-cloud-starter-netflix-eureka-server</artifactId>
        </dependency>
1.2 配置文件 application.yml
spring:
 application:
  name: SpringCloudService
server:
 port: 9000
eureka:
 instance:
  hostname: localhost
 client:
  registerWithEureka: false
  fetchRegistry: false
  serviceUrl:
   defaultZone: http://${eureka.instance.hostname}:${server.port}/eureka/
1.3 设置启动类 SpringCloudServiceApplication.java
package com.example.springcloudservice;

import org.springframework.boot.SpringApplication;
import org.springframework.boot.autoconfigure.SpringBootApplication;
import org.springframework.cloud.netflix.eureka.server.EnableEurekaServer;

@EnableEurekaServer
@SpringBootApplication
public class SpringCloudServiceApplication {

    public static void main(String[] args) {
        SpringApplication.run(SpringCloudServiceApplication.class, args);
    }

}
2. 创建 Config Server
2.1 创建 Spring Boot 项目
使用 Spring Initializr 创建一个 Spring Boot 项目,添加 Config Server 依赖。
  <dependency>
            <groupId>org.springframework.cloud</groupId>
            <artifactId>spring-cloud-config-server</artifactId>
        </dependency>

        <dependency>
            <groupId>org.springframework.boot</groupId>
            <artifactId>spring-boot-starter-test</artifactId>
            <scope>test</scope>
        </dependency>
2.2 配置文件 application.yml
server:
  port: 9001

spring:
  cloud:
    config:
      server:
        git:
          force-pull: true               #每次启动就会拉取最新的配置
          timeout: 10
          uri: http://192.168.0.208/fanchenbin/test.git   #github,gitlab 存储的仓库地址,需要先把仓库手动建立好,把配置文件传上去
          username: x-access-token        #如果是使用token就是固定值x-access-token,否则是账号
          password: github_pat_xxxx      #生成的Token 或者是密码
          default-label: master                # 仓库的分支,注意新版本可能是main
          clone-on-start: true
2.3 启动类 SpringCloudConfigServerApplication.java
package com.example.springcloudconfigserver;

import org.springframework.boot.SpringApplication;
import org.springframework.boot.autoconfigure.SpringBootApplication;
import org.springframework.cloud.config.server.EnableConfigServer;

@SpringBootApplication
@EnableConfigServer
public class SpringCloudConfigServerApplication {

    public static void main(String[] args) {
        SpringApplication.run(SpringCloudConfigServerApplication.class, args);
    }

}
3. 创建 Service A
3.1 创建 Spring Boot 项目
使用 Spring Initializr 创建一个 Spring Boot 项目,添加 Eureka Discovery Client 和 Web 依赖。
        <dependency>
            <groupId>org.springframework.boot</groupId>
            <artifactId>spring-boot-starter-web</artifactId>
        </dependency>


        <dependency>
            <groupId>org.springframework.boot</groupId>
            <artifactId>spring-boot-starter-test</artifactId>
            <scope>test</scope>
        </dependency>
        <dependency>
            <groupId>org.springframework.cloud</groupId>
            <artifactId>spring-cloud-starter-netflix-eureka-client</artifactId>
        </dependency>
3.2 配置文件 application.yml
spring:
  application:
    name: service-a       #服务名称
server:
  port: 9002
eureka:
  client:
    service-url:
      defaultZone: http://localhost:9000/eureka/    #服务发现服务端的地址
3.3 启动类 SpringCloudClientApplication.java
package com.example.springcloudclient;

import org.springframework.boot.SpringApplication;
import org.springframework.boot.autoconfigure.SpringBootApplication;
import org.springframework.cloud.client.discovery.EnableDiscoveryClient;

@SpringBootApplication
@EnableDiscoveryClient
public class SpringCloudClientApplication {

    public static void main(String[] args) {
        SpringApplication.run(SpringCloudClientApplication.class, args);
    }

}
3.4 创建一个简单的 REST 控制器 HelloController.java
package com.example.springcloudclient.controller;

import org.springframework.web.bind.annotation.GetMapping;
import org.springframework.web.bind.annotation.RestController;
import org.springframework.web.client.RestTemplate;

@RestController
public class HelloController {
    //restTemplate 是 Spring 提供的用于访问 HTTP 服务的客户端
    private final RestTemplate restTemplate;

    public HelloController(RestTemplate restTemplate) {
        this.restTemplate = restTemplate;
    }

    @GetMapping("/hello")
    public String hello() {
        return "Hello from Service A!";
    }

    @GetMapping("/one")
    public String one() {
        // 使用 restTemplate 访问 Service B  这里服务名称为 service-b 是 服务发现中的服务名称,只要该服务注册到注册中心,就可以通过服务名称访问到该服务
        // 这里的 restTemplate 就是 Spring 提供的用于访问 HTTP 服务的客户端
        return restTemplate.getForObject("http://service-b/hello", String.class);
    }
    @GetMapping("/two")
    public String two() {
        return restTemplate.getForObject("http://service-c/hello", String.class);
    }
}
@Configuration
public class AppConfig {

    @Bean
    @LoadBalanced
    public RestTemplate restTemplate() {
        return new RestTemplate();
    }
}
4. 创建 Service B
4.1 创建 Spring Boot 项目
使用 Spring Initializr 创建一个 Spring Boot 项目,添加 Eureka Discovery Client、Web 和 Config Client 依赖。
 <dependency>
            <groupId>org.springframework.boot</groupId>
            <artifactId>spring-boot-starter-web</artifactId>
        </dependency>
        <dependency>
            <groupId>org.springframework.cloud</groupId>
            <artifactId>spring-cloud-starter-config</artifactId>
        </dependency>
        <dependency>
            <groupId>org.springframework.cloud</groupId>
            <artifactId>spring-cloud-starter-netflix-eureka-client</artifactId>
        </dependency>

        <dependency>
            <groupId>org.springframework.boot</groupId>
            <artifactId>spring-boot-starter-test</artifactId>
            <scope>test</scope>
        </dependency>
4.2 配置文件 application.yml
spring:
  application:
    name: service-b
  config:
    import: configserver:http://localhost:9001/    #这里指定configserver的地址
  cloud:
    config:
      uri: http://localhost:9001  # 这里指定configserver地址,如果指定了上面的地址这里可以不用指定了
      profile: dev   #这里可以指定环境,default 表示默认环境,dev表示开发环境,test表示测试环境,prod表示生产环境。通过指定的环境会在configserver上读取相应的配置。
                     #例如指定dev 就会读取service-b-dev.yml文件。
logging:
  level:
    root: INFO
    com.netflix.discovery: DEBUG     # 只开启eureka的debug日志
server:
  port: 9003

eureka:
  client:
    serviceUrl:
      defaultZone: http://localhost:9000/eureka/
#    register-with-eureka: true
#    fetch-registry: true
4.3 启动类 SpringCloudClient2Application.java
package com.example.springcloudclient2;

import org.springframework.boot.SpringApplication;
import org.springframework.boot.autoconfigure.SpringBootApplication;
import org.springframework.cloud.client.discovery.EnableDiscoveryClient;

@SpringBootApplication
@EnableDiscoveryClient
public class SpringCloudClient2Application {

    public static void main(String[] args) {
        SpringApplication.run(SpringCloudClient2Application.class, args);
    }

}
4.4 创建一个 REST 控制器 HelloController.java
package com.example.springcloudclient2.controller;

import org.springframework.beans.factory.annotation.Value;
import org.springframework.web.bind.annotation.GetMapping;
import org.springframework.web.bind.annotation.RequestMapping;
import org.springframework.web.bind.annotation.RestController;
import org.springframework.web.client.RestTemplate;

@RestController
public class HelloController {

    @Value("${message}")  //这里是通过配置中心直接读取配置中心的yaml文件的配置
    private String message;

    private final RestTemplate restTemplate;

    public HelloController(RestTemplate restTemplate) {
        this.restTemplate = restTemplate;
    }

    @GetMapping("/hello")
    public String hello() {
        return "Hello from Service B!";
    }

    @GetMapping("/one")
    public String one() {
        String serviceAResponse = restTemplate.getForObject("http://service-a/hello", String.class);
        return message + " " + serviceAResponse;
    }
    @GetMapping("/two")
    public String three() {
        String serviceAResponse = restTemplate.getForObject("http://service-c/hello", String.class);
        return message + " " + serviceAResponse;
    }
}
@Configuration
public class AppConfig {

    @Bean
    @LoadBalanced
    public RestTemplate restTemplate() {
        return new RestTemplate();
    }
}
service-b-dev.yml 配置
{
  "message": "aaa"
}
5. 创建 Service C
和Service A 一样,只是端口不一样,用的9004
6. 创建 Gateway
6.1 创建 Spring Boot 项目
使用 Spring Initializr 创建一个 Spring Boot 项目 , 引入 Gateway 和 Eureka Discovery Client
<dependency>
            <groupId>org.springframework.cloud</groupId>
            <artifactId>spring-cloud-starter-gateway</artifactId>
        </dependency>
        <dependency>
            <groupId>org.springframework.cloud</groupId>
            <artifactId>spring-cloud-starter-netflix-eureka-client</artifactId>
        </dependency>

        <dependency>
            <groupId>org.springframework.boot</groupId>
            <artifactId>spring-boot-starter-test</artifactId>
            <scope>test</scope>
        </dependency>
6.2 配置文件 application.yml
spring:
  application:
    name: gateway-service   #指定网关服务的应用名称
  cloud:
    gateway:
      routes:
        - id: service-a-route            #路由的唯一标识符,每个路由规则需要一个唯一的 id,用于区分不同的路由
          uri: lb://SERVICE-A           #指定路由的目标地址,表示使用负载均衡(lb)将请求转发到名为 service-a 的服务
          predicates:
            - Path=/service-a/**        #定义路由的匹配条件。Path=/service-a/**:表示当请求路径以 /service-a/ 开头时,匹配该路由. ** 是通配符,表示匹配任意子路径。
          filters:
            - StripPrefix=1                 #定义路由的过滤器. StripPrefix=1:表示去掉请求路径中的第一个前缀(即 /service-a)。例如,请求路径为 /service-a/hello,经过 StripPrefix=1 处理后,转发到 service-a 的路径变为 /hello。
        - id: service-b-route
          uri: lb://SERVICE-B
          predicates:
            - Path=/service-b/**
          filters:
            - RewritePath=/service-b/(?<segment>.*), /$\{segment}      #这个配置主要用于在网关接收到请求后,利用正则表达式将请求路径中特定的前缀部分去除,然后将处理后的路径转发到实际的服务。效果和上面 StripPrefix=1  一样

server:
  port: 9005       #当前网关的端口号

eureka:
  client:
    serviceUrl:
      defaultZone: http://localhost:9000/eureka/    #表示 Eureka Server 的注册中心地址。
测试效果
先运行 SpringCloudService 服务, 再运行SpringCloudConfigServer配置中心 服务,其他服务可以不按照顺序依次运行起来
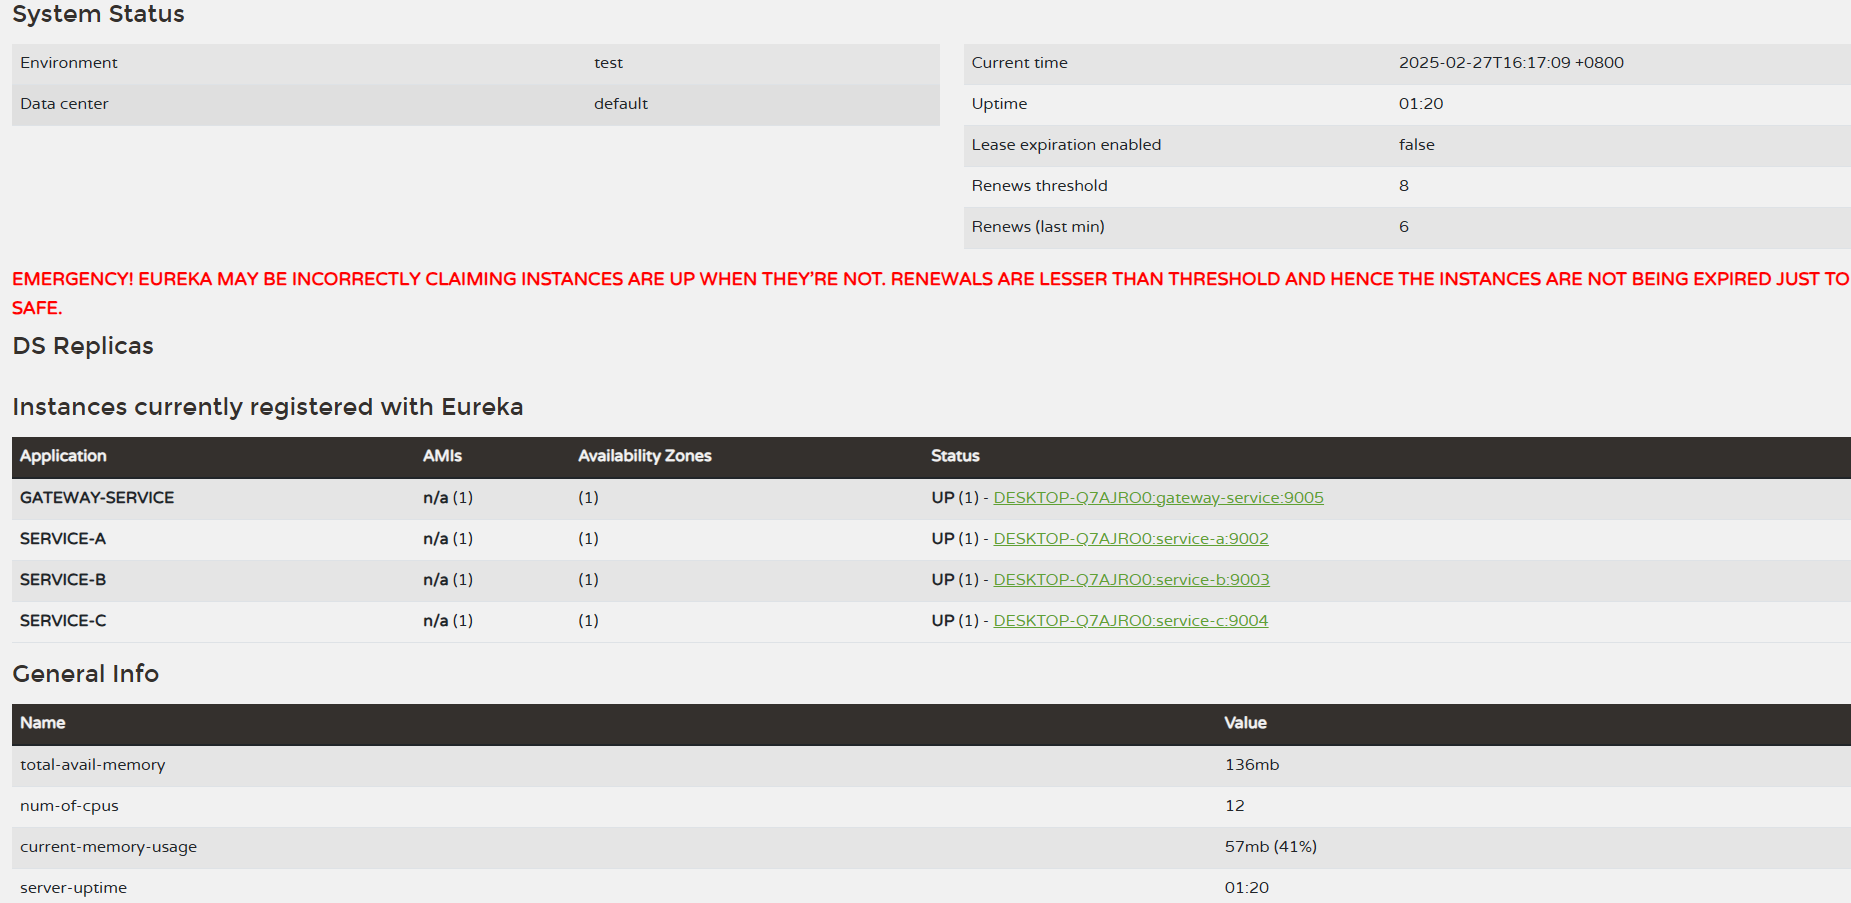
测试 服务注册与发现
访问 Eureka Server端 http://localhost:9000/ ,可以看到几个客户端服务都注册成功了
测试 服务注册与发现 和配置中心
访问配置中心+对应的服务名+环境可以得到配置信息。例如 http://localhost:9001/service-b/dev
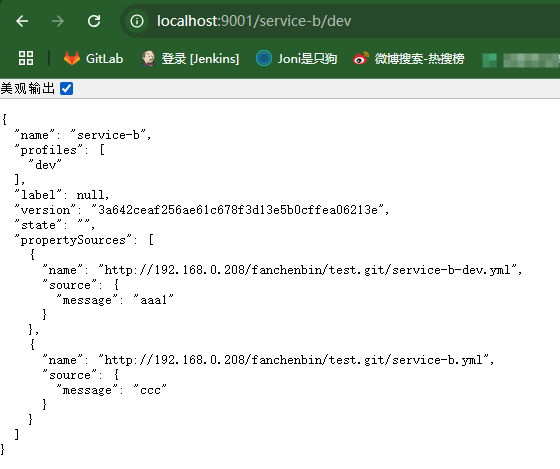
访问 Service-b 服务 接口 http://localhost:9003/one 会 输出 aaa1 Hello from Service A 。 说明服务调用也正确,配置中心读取也正确了(这里aaa1是读取的配置中心配置的字段)

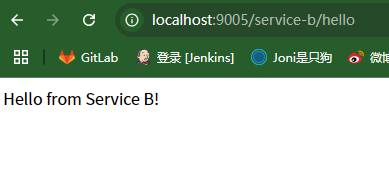
测试 网关
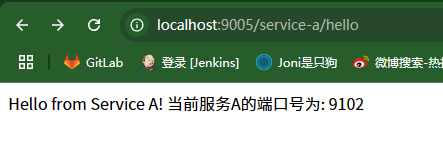
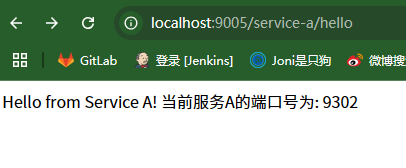
访问网关的服务+对应服务名+接口名称。例如这里访问 http://localhost:9005/service-a/hello 和 http://localhost:9005/service-b/hello 。可以自动转发到对应的服务接口地址上

测试 网关负载均衡
这里只测试service-a 服务的负载均衡,修改hello接口,用于获取当前运行实例的端口
package com.example.springcloudclient.controller;

import org.springframework.beans.factory.annotation.Autowired;
import org.springframework.core.env.Environment;
import org.springframework.web.bind.annotation.GetMapping;
import org.springframework.web.bind.annotation.RestController;
import org.springframework.web.client.RestTemplate;

@RestController
public class HelloController {
    @Autowired
    private Environment env;


    @GetMapping("/hello")
    public String hello() {
        // 获取当前实例的端口号
        String port = env.getProperty("local.server.port");
        return "Hello from Service A! 当前服务A的端口号为: " + port;
    }
}
打包文件,运行不同端口的实例
java -jar SpringCloudClient-0.0.1-SNAPSHOT.jar --server.port=9102
java -jar SpringCloudClient-0.0.1-SNAPSHOT.jar --server.port=9202
java -jar SpringCloudClient-0.0.1-SNAPSHOT.jar --server.port=9302
Eureka 服务端 也可以看到各个实例都已经注册成功

运行网关对应的 service-a 服务的hello接口,不停地刷新,可以看到每次访问的服务A的端口号是依次切换的,说明负载均衡已经成功

6. Spring Security
基本定义
Spring Security 是基于 Spring 框架构建的身份验证与访问控制框架,为 Java 应用提供全面的安全防护. 通过 Spring 的 AOP 思想和 Servlet 过滤器链实现安全控制,依赖 IoC(控制反转)和 DI(依赖注入)简化配置
SecurityContextPersistenceFilter:负责在请求开始时从会话中获取安全上下文,并在请求结束时将安全上下文保存到会话中。
UsernamePasswordAuthenticationFilter:处理表单登录请求,验证用户名和密码。
FilterSecurityInterceptor:根据配置的访问规则,对请求进行访问控制检查。
简单示例
1. 创建项目依赖。这里通过内存存储的账号密码,没有通过数据库校验
-
Spring Web
-
Spring Security
-
Thymeleaf (用于演示页面)
        <dependency>
            <groupId>org.springframework.boot</groupId>
            <artifactId>spring-boot-starter-security</artifactId>
        </dependency>
        <dependency>
            <groupId>org.springframework.boot</groupId>
            <artifactId>spring-boot-starter-web</artifactId>
        </dependency>

        <dependency>
            <groupId>org.springframework.boot</groupId>
            <artifactId>spring-boot-starter-test</artifactId>
            <scope>test</scope>
        </dependency>
        <dependency>
            <groupId>org.springframework.security</groupId>
            <artifactId>spring-security-test</artifactId>
            <scope>test</scope>
        </dependency>
        <dependency>
            <groupId>org.springframework.boot</groupId>
            <artifactId>spring-boot-starter-thymeleaf</artifactId>
        </dependency>
2. 基础安全配置
package com.example.springsecurity.config;

import org.springframework.context.annotation.Bean;
import org.springframework.context.annotation.Configuration;
import org.springframework.security.config.annotation.web.builders.HttpSecurity;
import org.springframework.security.config.annotation.web.configuration.EnableWebSecurity;
import org.springframework.security.core.userdetails.User;
import org.springframework.security.core.userdetails.UserDetails;
import org.springframework.security.core.userdetails.UserDetailsService;
import org.springframework.security.crypto.bcrypt.BCryptPasswordEncoder;
import org.springframework.security.crypto.password.PasswordEncoder;
import org.springframework.security.provisioning.InMemoryUserDetailsManager;
import org.springframework.security.web.SecurityFilterChain;

@Configuration  // 标记为配置类
@EnableWebSecurity  // 启用Spring Security的Web安全支持
public class SecurityConfig
{

    /**
     * 配置安全过滤器链(核心安全配置)
     * @param http HTTP安全配置对象
     * @return 构建的安全过滤器链
     */
    @Bean
    public SecurityFilterChain securityFilterChain(HttpSecurity http) throws Exception {
        http
                // 授权配置:定义哪些请求需要认证/授权。这里过滤器通过匹配路由对配置的路由进行拦截
                .authorizeHttpRequests(auth -> auth
                        .requestMatchers("/", "/home", "/login").permitAll() // 允许匿名访问
                        .requestMatchers("/admin/**").hasRole("ADMIN")  // 需要ADMIN角色
                        .anyRequest().authenticated()  // 其他请求需要认证
                )
                // 表单登录配置
                .formLogin(form -> form
                        .loginPage("/login")  // 自定义登录页路径
                        .permitAll()  // 允许所有用户访问登录页
                        .defaultSuccessUrl("/dashboard")  // 登录成功后的默认跳转地址
                        .failureUrl("/login?error=true")  // 登录失败跳转地址
                )
                // 退出登录配置
                .logout(logout -> logout
                        .logoutSuccessUrl("/login?logout=true")  // 退出成功后的跳转地址
                        .permitAll()  // 允许所有用户访问退出功能
                );
        return http.build();
    }

    /**
     * 密码编码器(必须配置)
     * 使用BCrypt强哈希算法加密密码
     */
    @Bean
    public PasswordEncoder passwordEncoder() {
        return new BCryptPasswordEncoder();
    }

    /**
     * 内存用户存储(演示用,生产环境请使用数据库)
     * 创建两个测试用户:
     * - 普通用户(user/1)
     * - 管理员(admin/1)
     */
    @Bean
    public UserDetailsService userDetailsService() {
        // 创建普通用户(注意使用passwordEncoder加密密码)
        UserDetails user = User.builder()
                .username("user")
                .password(passwordEncoder().encode("1"))  // 必须加密
                .roles("USER")  // 自动添加ROLE_前缀
                .build();

        // 创建管理员用户
        UserDetails admin = User.builder()
                .username("admin")
                .password(passwordEncoder().encode("1"))
                .roles("ADMIN")  // 可以添加多个角色,例如:.roles("ADMIN", "USER")
                .build();

        return new InMemoryUserDetailsManager(user, admin);
    }
}
3. 创建控制器和相应页面
package com.example.springsecurity.controller;

import org.springframework.stereotype.Controller;
import org.springframework.web.bind.annotation.GetMapping;

@Controller  // 声明为控制器
public class HomeController {

    /**
     * 首页(允许匿名访问)
     */
    @GetMapping("/")
    public String home() {
        return "home";  // 返回home.html模板。这里和html命名一致,就会跳转到对应页面
    }


    /**
     * 用户仪表盘(需要登录)
     */
    @GetMapping("/dashboard")
    public String dashboard() {
        return "dashboard";  // 返回dashboard.html模板
    }

    // 添加登录页面的GET请求处理
    @GetMapping("/login")
    public String loginPage() {
        return "login"; // 返回 login.html 模板
    }

    /**
     * 管理员页面(需要ADMIN角色)
     */
    @GetMapping("/admin")
    public String admin() {
        return "admin";  // 返回admin.html模板
    }
}
创建home.html. 这个页面不需要授权可以直接访问
<!DOCTYPE html>
<html lang="en">
<head>
    <meta charset="UTF-8">
    <title>Home</title>
</head>
<body>
<h1>Home Page</h1>
<p>Welcome to our website!</p>
</body>
</html>
创建login.html。 注意:
Spring Security 框架内部已经实现了一套完整的登录认证逻辑,当你在配置类中配置了表单登录(如 formLogin() 方法),Spring Security 会自动创建一个过滤器来处理 /login 的 POST 请求。具体而言,当用户在前端表单输入用户名和密码并提交表单时,Spring Security 会拦截这个 POST /login 请求,并进行以下操作:
获取用户名和密码:从请求中提取 username 和 password 参数。
用户认证:使用配置好的 UserDetailsService 从存储(如内存、数据库)中查找用户信息,并与输入的用户名和密码进行比对。
认证结果处理:
认证成功:根据配置的 defaultSuccessUrl 或其他逻辑将用户重定向到相应的页面。
认证失败:根据配置的 failureUrl 将用户重定向到登录页面,并附带错误参数(如 error=true)。
<!DOCTYPE html>
<html xmlns:th="http://www.thymeleaf.org">
<head>
    <title>Login</title>
</head>
<body>
<!-- 错误提示 -->
<div th:if="${param.error}">用户名或密码错误</div>
<!-- 退出提示 -->
<div th:if="${param.logout}">您已退出登录</div>

<!-- Spring Security的登录表单必须:
     1. action指向/login
     2. 使用post方法
     3. 用户名字段名为username
     4. 密码字段名为password -->
<!-- login.html -->
<form th:action="@{/login}" method="post">
    <!-- 自动添加 CSRF 令牌(Thymeleaf 模板) -->
    <input type="hidden" th:name="${_csrf.parameterName}" th:value="${_csrf.token}"/>

    <input type="text" name="username" placeholder="Username">
    <input type="password" name="password" placeholder="Password">
    <input type="submit" value="Login">
</form>
</body>
</html>
创建dashboard.html。 只有授权的账号才能访问
<!DOCTYPE html>
<html xmlns:th="http://www.thymeleaf.org">
<head>
  <title>Dashboard</title>
</head>
<body>
<h1>用户控制台</h1>
<!-- 管理员链接(对没有权限的用户会显示404) -->
<a th:href="@{/admin}">管理员区域</a>

<!-- Spring Security的退出表单必须:
     1. action指向/logout
     2. 使用post方法
     3. 需要CSRF令牌(默认启用) -->
<form th:action="@{/logout}" method="post">
  <input type="submit" value="退出登录"/>
</form>
</body>
</html>
创建admin.html 。只有管理员账号可以访问
<!DOCTYPE html>
<html lang="en">
<head>
    <meta charset="UTF-8">
    <title>Admin</title>
</head>
<body>
<h1>Admin Page</h1>
<p>Welcome to our website!</p>
</body>
</html>
4. 测试
/:公共页面

/dashboard:需要登录

/admin:需要ADMIN角色
基于OAuth2.1 实现 授权码模式(web端登录),授权码+PKCE模式(移动端登录),自定义密码模式(可以用于移动端账号密码登录,短信登录,小程序登录等等)
SecurityConfig完整配置在下面第3点开头
1. pom.xml 引入相关的包
<dependency>
            <groupId>org.springframework.security</groupId>
            <artifactId>spring-security-oauth2-authorization-server</artifactId>
            <version>1.4.2</version>
        </dependency>
        <dependency>
            <groupId>org.springframework.boot</groupId>
            <artifactId>spring-boot-starter-thymeleaf</artifactId>
        </dependency>
        <dependency>
            <groupId>org.springframework.boot</groupId>
            <artifactId>spring-boot-starter-oauth2-resource-server</artifactId>
        </dependency>
2. 添加登录页面相关的信息及数据库相应配置
配置application.yaml . 指向登录页面的文件夹
spring:
  thymeleaf:
    prefix: classpath:/templates/
    suffix: .html
    cache: false
创建 login.html 登录界面
<!DOCTYPE html>
<html xmlns:th="http://www.thymeleaf.org">
<head>
    <title>Login</title>
</head>
<body>
<!-- 错误提示 -->
<div th:if="${param.error}">用户名或密码错误</div>
<!-- 退出提示 -->
<div th:if="${param.logout}">您已退出登录</div>

<!-- Spring Security的登录表单必须:
     1. action指向/login
     2. 使用post方法
     3. 用户名字段名为username
     4. 密码字段名为password -->
<!-- login.html -->
<form th:action="@{/login}" method="post">
    <!-- 自动添加 CSRF 令牌(Thymeleaf 模板) -->
    <input type="hidden" th:name="${_csrf.parameterName}" th:value="${_csrf.token}"/>

    <input type="text" name="username" placeholder="Username">
    <input type="password" name="password" placeholder="Password">
    <input type="submit" value="Login">
</form>
</body>
</html>
相关的控制器
@Controller
public class TestAuthController {
    /**
     * 首页(允许匿名访问)
     */
    @GetMapping("/home")
    public String home() {
        return "home";  // 返回home.html模板
    }
    // 添加登录页面的GET请求处理
    @GetMapping("/login")
    public String loginPage() {
        return "login"; // 返回 login.html 模板
    }

    /**
     * 生成PKCE 对应的codeVerifier和codeChallenge
     * @return
     */
    @GetMapping("/login/pkce")
    public String pkce() {
        try {
            //生成code_verifier
            String codeVerifier = codeVerifierGenerator();
            //生成code_challenge
            String codeChallenge = codeChallengeGenerator(codeVerifier);

            System.out.println("code_verifier:"+codeVerifier);
            System.out.println("code_challenge:"+codeChallenge);
        }
        catch (Exception e) {
            e.printStackTrace();
        }

        return "pkce";  // 返回home.html模板
    }
    public static String codeVerifierGenerator(){
        return  Base64URL.encode(UUID.randomUUID().toString()).toString();
    }


    public static String codeChallengeGenerator(String codeVerifier) throws NoSuchAlgorithmException {
        MessageDigest messageDigest = MessageDigest.getInstance("SHA-256");
        byte[] digestCodeVerifier = messageDigest.digest(codeVerifier.getBytes(StandardCharsets.US_ASCII));
        return Base64URL.encode(digestCodeVerifier).toString();
    }

}
如果不用上面简单示例使用内存中的用户,可以用数据库的数据进行校验账号密码,这里用的Spring Data Jpa ,只需要在Service 继承UserDetailsService ,重写对应的loadUserByUsername方法就行了
import com.example.springbootdemo.domain.*;
import org.springframework.data.jpa.repository.JpaRepository;

public interface AccountRepository extends JpaRepository<Account, Long>
{
    Account findByUsername(String username);
}
@Getter
@Setter
@Entity
public class Account implements UserDetails {

    public Account() {}
    @Id
    @GeneratedValue(strategy = GenerationType.IDENTITY)
    private Long id;
    @Column(unique = true)
    private String username;

    private String password;

    // 实现UserDetails接口方法
    @Override
    public Collection<? extends GrantedAuthority> getAuthorities() {
        return Collections.emptyList();
    }
}
import com.example.springbootdemo.domain.Account;
import com.example.springbootdemo.service.test.AccountRepository;
import org.springframework.beans.factory.annotation.Autowired;
import org.springframework.security.core.userdetails.UserDetails;
import org.springframework.security.core.userdetails.UserDetailsService;
import org.springframework.security.core.userdetails.UsernameNotFoundException;
import org.springframework.security.crypto.bcrypt.BCryptPasswordEncoder;
import org.springframework.security.crypto.password.PasswordEncoder;
import org.springframework.stereotype.Service;

@Service
public class CustomUserDetailsService implements UserDetailsService {

    @Autowired
    private AccountRepository userService;

    /**
     * 根据用户名加载用户详情
     * @param username 用户名
     * @return UserDetails 对象
     * @throws UsernameNotFoundException 用户未找到异常
     */
    @Override
    public UserDetails loadUserByUsername(String username) throws UsernameNotFoundException {
        Account user = userService.findByUsername(username);
        if (user == null) {
            throw new UsernameNotFoundException("User not found");
        }
        return new org.springframework.security.core.userdetails.User(
                user.getUsername(),
                //user.getPassword(),
                passwordEncoder().encode(user.getPassword()), // 密码加密
                //"{noop}" + user.getPassword(), // 让 Spring Security 识别明文密码
                user.getAuthorities()
        );
    }
    public PasswordEncoder passwordEncoder() {
        return new BCryptPasswordEncoder();
    }
}
添加相应的数据库配置。这里就是上面spring data jpa演示的配置
spring:
  thymeleaf:
    prefix: classpath:/templates/
    suffix: .html
    cache: false
  application:
    name: SpringBootDemo
  datasource:
    url: jdbc:mysql://localhost:3306/hello?useUnicode=true&characterEncoding=utf8&useSSL=false&useLegacyDatetimeCode=false
    username: root
    password: hua3182486
    driver-class-name: com.mysql.cj.jdbc.Driver
  jpa:
    show-sql: true #打印sql语句
#    generate-ddl: true
    hibernate:
      ddl-auto: update
      #update:该配置比较常用,当服务首次启动会在数据库中生成相应表,后续启动服务时如果实体类有增加属性会在数据中添加相应字段,原来数据仍在保留
      #create :该值慎用,每次重启项目的时候都会删除表结构,重新生成,原来数据会丢失不见。
      #create-drop :慎用,当项目关闭,数据库中的表会被删掉。
      #validate : 验证数据库和实体类的属性是否匹配,不匹配将会报错。
    properties:
      hibernate.format_sql: true #格式化sql语句
      hibernate.dialect: org.hibernate.dialect.MySQL5Dialect #数据库方言,要和数据库匹配
3. 添加SecurityConfig配置类
下面示例完整的SecurityConfig配置
package com.example.springbootdemo.config.oauth; import com.example.springbootdemo.authorization.password.PasswordGrantAuthenticationConverter; import com.example.springbootdemo.authorization.password.PasswordGrantAuthenticationProvider; import com.example.springbootdemo.constant.OAuth2Constant; import com.example.springbootdemo.filters.CustomAuthenticationEntryPoint; import com.example.springbootdemo.filters.MyAuthenticationFailureHandler; import com.nimbusds.jose.jwk.JWKSet; import com.nimbusds.jose.jwk.RSAKey; import com.nimbusds.jose.jwk.source.ImmutableJWKSet; import com.nimbusds.jose.jwk.source.JWKSource; import com.nimbusds.jose.proc.SecurityContext; import org.springframework.context.annotation.Bean; import org.springframework.context.annotation.Configuration; import org.springframework.core.annotation.Order; import org.springframework.http.MediaType; import org.springframework.jdbc.core.JdbcTemplate; import org.springframework.security.config.Customizer; import org.springframework.security.config.annotation.web.builders.HttpSecurity; import org.springframework.security.config.annotation.web.configuration.EnableWebSecurity; import org.springframework.security.crypto.bcrypt.BCryptPasswordEncoder; import org.springframework.security.crypto.password.PasswordEncoder; import org.springframework.security.oauth2.core.AuthorizationGrantType; import org.springframework.security.oauth2.core.ClientAuthenticationMethod; import org.springframework.security.oauth2.core.oidc.OidcScopes; import org.springframework.security.oauth2.jose.jws.SignatureAlgorithm; import org.springframework.security.oauth2.jwt.NimbusJwtEncoder; import org.springframework.security.oauth2.server.authorization.*; import org.springframework.security.oauth2.server.authorization.client.InMemoryRegisteredClientRepository; import org.springframework.security.oauth2.server.authorization.client.JdbcRegisteredClientRepository; import org.springframework.security.oauth2.server.authorization.client.RegisteredClient; import org.springframework.security.oauth2.server.authorization.client.RegisteredClientRepository; import org.springframework.security.oauth2.server.authorization.config.annotation.web.configurers.OAuth2AuthorizationServerConfigurer; import org.springframework.security.oauth2.server.authorization.settings.AuthorizationServerSettings; import org.springframework.security.oauth2.server.authorization.settings.ClientSettings; import org.springframework.security.oauth2.server.authorization.settings.OAuth2TokenFormat; import org.springframework.security.oauth2.server.authorization.settings.TokenSettings; import org.springframework.security.oauth2.server.authorization.token.*; import org.springframework.security.web.SecurityFilterChain; import org.springframework.security.web.authentication.LoginUrlAuthenticationEntryPoint; import org.springframework.security.web.util.matcher.MediaTypeRequestMatcher; import javax.sql.DataSource; import java.security.*; import java.security.interfaces.RSAPrivateKey; import java.security.interfaces.RSAPublicKey; import java.security.spec.PKCS8EncodedKeySpec; import java.security.spec.X509EncodedKeySpec; import java.time.Duration; import java.util.Base64; import java.util.UUID; @Configuration // 标记为 Spring 配置类 @EnableWebSecurity // 启用 Spring Security public class SecurityConfig { /** * 配置 OAuth2 授权服务器的安全过滤器链 * * @param http Spring Security 的 HttpSecurity 对象 * @return SecurityFilterChain 安全过滤器链 * @throws Exception 配置过程中可能抛出的异常 */ @Bean @Order(1) // 指定过滤器链的优先级,授权服务器的安全配置优先 public SecurityFilterChain authorizationServerSecurityFilterChain(HttpSecurity http, OAuth2AuthorizationService authorizationService, OAuth2TokenGenerator<?> tokenGenerator) throws Exception { // 创建 OAuth2 授权服务器的配置 OAuth2AuthorizationServerConfigurer authorizationServerConfigurer = OAuth2AuthorizationServerConfigurer.authorizationServer(); http // 只匹配 OAuth2 授权服务器的相关端点 .securityMatcher(authorizationServerConfigurer.getEndpointsMatcher()) .with(authorizationServerConfigurer, (authorizationServer) -> authorizationServer //设置自定义密码模式 .tokenEndpoint(tokenEndpoint -> tokenEndpoint .accessTokenRequestConverter( new PasswordGrantAuthenticationConverter()) .authenticationProvider( new PasswordGrantAuthenticationProvider( authorizationService, tokenGenerator)) .errorResponseHandler(new MyAuthenticationFailureHandler()) // 自定义认证失败处理器 ) .oidc(Customizer.withDefaults()) // 启用 OpenID Connect 1.0 ) // 任何请求都需要认证 .authorizeHttpRequests((authorize) -> authorize .anyRequest().authenticated() ) .with(authorizationServerConfigurer, customizer -> customizer.oidc(Customizer.withDefaults())) // 启用 OIDC(可选) // 未认证时,HTML 请求重定向到 /login 页面 .exceptionHandling((exceptions) -> exceptions .defaultAuthenticationEntryPointFor( //new LoginUrlAuthenticationEntryPoint("/login"), new ClientAwareAuthenticationEntryPoint(), //根据客户端id自定义跳转登录界面 new MediaTypeRequestMatcher(MediaType.TEXT_HTML) ) .authenticationEntryPoint(new CustomAuthenticationEntryPoint()) ) ; return http.build(); // 构建安全过滤器链 } /** * 配置默认的 Spring Security 过滤器链,处理用户身份认证 * * @param http Spring Security 的 HttpSecurity 对象 * @return SecurityFilterChain 安全过滤器链 * @throws Exception 配置过程中可能抛出的异常 */ @Bean @Order(2) // 低于授权服务器的过滤器链优先级 public SecurityFilterChain defaultSecurityFilterChain(HttpSecurity http) throws Exception { http //.csrf(csrf -> csrf.disable()) // 禁用 CSRF(移动端无 Cookie 场景) // 任何请求都需要认证 .authorizeHttpRequests((authorize) -> authorize .requestMatchers("/auth/login", "/api/auth/refresh","/home","/login/**").permitAll() .anyRequest().authenticated() ) // 使用 Spring Security 默认的表单登录 //.formLogin(Customizer.withDefaults()); // 使用自定义表单登录配置 .formLogin(form -> form .loginPage("/login") // // 默认登录页 .permitAll() // 允许所有用户访问登录页 ) .oauth2ResourceServer((resourceServer) -> resourceServer .jwt(Customizer.withDefaults()) .authenticationEntryPoint(new CustomAuthenticationEntryPoint()) // 自定义认证失败处理器 ); return http.build(); } /** * 配置 OAuth2 客户端信息(存储在内存中) * * @return RegisteredClientRepository OAuth2 客户端存储库 */ /* @Bean public RegisteredClientRepository registeredClientRepository() { // 配置一个 OpenID Connect (OIDC) 客户端 RegisteredClient oidcClient = RegisteredClient.withId(UUID.randomUUID().toString()) .clientName("OIDC客户端") .clientId("oidc-client") // 客户端 ID //.clientSecret("{noop}secret") // 客户端密钥(未加密) .clientSecret(passwordEncoder().encode("secret")) // 客户端密钥(加密) .clientAuthenticationMethod(ClientAuthenticationMethod.CLIENT_SECRET_BASIC) // 认证方式 .authorizationGrantType(AuthorizationGrantType.AUTHORIZATION_CODE) // 授权码模式 .authorizationGrantType(AuthorizationGrantType.REFRESH_TOKEN) // 允许刷新令牌 .redirectUri("http://localhost:8088/code") // 认证成功后的回调地址 .postLogoutRedirectUri("http://localhost:8088/") // 退出后的回调地址 .scope(OidcScopes.OPENID) // 启用 OpenID 作用域 .scope(OidcScopes.PROFILE) // 允许访问用户基本信息 .scope("myResource") // 自定义作用域 .clientSettings(ClientSettings.builder().requireAuthorizationConsent(true).build()) // 需要用户授权 .tokenSettings(TokenSettings.builder() .accessTokenTimeToLive(Duration.ofMinutes(30)) // 设置访问令牌过期时间为 30 分钟 .refreshTokenTimeToLive(Duration.ofDays(1)) // 设置刷新令牌过期时间为 1 天 .build()) .build(); RegisteredClient mobileClient = RegisteredClient.withId(UUID.randomUUID().toString()) .clientId("mobile-client") // 客户端 ID .clientName("授权码+PKCE客户端") .clientAuthenticationMethod(ClientAuthenticationMethod.NONE) // 认证方式 .authorizationGrantType(AuthorizationGrantType.AUTHORIZATION_CODE) // 授权码模式 .authorizationGrantType(AuthorizationGrantType.REFRESH_TOKEN) // 允许刷新令牌 .redirectUri("http://localhost:8088/code") // 认证成功后的回调地址 .postLogoutRedirectUri("http://localhost:8088/") // 退出后的回调地址 .scope(OidcScopes.OPENID) // 启用 OpenID 作用域 .scope(OidcScopes.PROFILE) // 允许访问用户基本信息 .clientSettings( ClientSettings.builder() .requireAuthorizationConsent(true) .requireProofKey(true) // 关键配置:强制客户端使用 PKCE 进行授权 .build()) // 需要用户授权 .tokenSettings(TokenSettings.builder() .accessTokenTimeToLive(Duration.ofMinutes(30)) // 设置访问令牌过期时间为 30 分钟 .refreshTokenTimeToLive(Duration.ofDays(1)) // 设置刷新令牌过期时间为 1 天 .reuseRefreshTokens(true) .idTokenSignatureAlgorithm(SignatureAlgorithm.RS256) // // 设置 ID 令牌签名算法为 RS256 .accessTokenFormat(OAuth2TokenFormat.SELF_CONTAINED) // 设置访问令牌格式为 JWT .build()) .build(); RegisteredClient passwordClient = RegisteredClient.withId(UUID.randomUUID().toString()) .clientName("自定义密码模式客户端") .clientId("password-client") // 客户端 ID .clientSecret(passwordEncoder().encode("secret2")) // 客户端密钥(加密) .clientAuthenticationMethod(ClientAuthenticationMethod.CLIENT_SECRET_BASIC) // 认证方式 .authorizationGrantType(new AuthorizationGrantType(OAuth2Constant.GRANT_TYPE_PASSWORD)) // 密码模式 .authorizationGrantType(AuthorizationGrantType.REFRESH_TOKEN) // 允许刷新令牌 .redirectUri("http://localhost:8088/code") // 认证成功后的回调地址 .postLogoutRedirectUri("http://localhost:8088/") // 退出后的回调地址 .scope(OidcScopes.OPENID) // 启用 OpenID 作用域 .scope(OidcScopes.PROFILE) // 允许访问用户基本信息 .clientSettings(ClientSettings.builder().requireAuthorizationConsent(true).build()) // 需要用户授权 .tokenSettings(TokenSettings.builder() .accessTokenTimeToLive(Duration.ofMinutes(30)) // 设置访问令牌过期时间为 30 分钟 .refreshTokenTimeToLive(Duration.ofDays(1)) // 设置刷新令牌过期时间为 1 天 .reuseRefreshTokens(true) .idTokenSignatureAlgorithm(SignatureAlgorithm.RS256) // // 设置 ID 令牌签名算法为 RS256 .accessTokenFormat(OAuth2TokenFormat.SELF_CONTAINED) // 设置访问令牌格式为 JWT .build()) .build(); return new InMemoryRegisteredClientRepository(oidcClient,mobileClient,passwordClient); // 使用内存存储客户端信息,如果使用数据库存储,请使用 jpa 存储库继承 RegisteredClientRepository 实现 }*/ /** * 授权信息(存储在内存中) */ /* @Bean public OAuth2AuthorizationService authorizationService(RegisteredClientRepository registeredClientRepository) { return new InMemoryOAuth2AuthorizationService(); }*/ /** * 客户端信息(存储在数据库中,直接引用数据库数据的版本) * 对应表:oauth2_registered_client */ /* @Bean public RegisteredClientRepository registeredClientRepository(JdbcTemplate jdbcTemplate) { //System.out.println(passwordEncoder().encode("secret"));//打印加密后的密码 return new JdbcRegisteredClientRepository(jdbcTemplate); }*/ /** * 客户端信息(存储在数据库中,写入初始值的版本) * 对应表:oauth2_registered_client */ @Bean public JdbcRegisteredClientRepository registeredClientRepository(DataSource dataSource, PasswordEncoder passwordEncoder) { JdbcRegisteredClientRepository registeredClientRepository = new JdbcRegisteredClientRepository(new JdbcTemplate(dataSource)); // 检查数据库是否已存在客户端,若不存在则初始化 if (registeredClientRepository.findByClientId("oidc-client") == null) { // 配置一个 OpenID Connect (OIDC) 客户端 RegisteredClient oidcClient = RegisteredClient.withId(UUID.randomUUID().toString()) .clientName("OIDC客户端") .clientId("oidc-client") // 客户端 ID .clientSecret(passwordEncoder.encode("secret")) // 客户端密钥(加密) .clientAuthenticationMethod(ClientAuthenticationMethod.CLIENT_SECRET_BASIC) // 认证方式 .authorizationGrantType(AuthorizationGrantType.AUTHORIZATION_CODE) // 授权码模式 .authorizationGrantType(AuthorizationGrantType.REFRESH_TOKEN) // 允许刷新令牌 .redirectUri("http://localhost:8088/code") // 认证成功后的回调地址 .postLogoutRedirectUri("http://localhost:8088/") // 退出后的回调地址 .scope(OidcScopes.OPENID) // 启用 OpenID 作用域 .scope(OidcScopes.PROFILE) // 允许访问用户基本信息 .scope("myResource") // 自定义作用域 .clientSettings(ClientSettings.builder().requireAuthorizationConsent(true).build()) // 需要用户授权 .tokenSettings(TokenSettings.builder() .accessTokenTimeToLive(Duration.ofMinutes(30)) // 设置访问令牌过期时间为 30 分钟 .refreshTokenTimeToLive(Duration.ofDays(1)) // 设置刷新令牌过期时间为 1 天 .build()) .build(); RegisteredClient mobileClient = RegisteredClient.withId(UUID.randomUUID().toString()) .clientId("mobile-client") // 客户端 ID .clientName("授权码+PKCE客户端") .clientAuthenticationMethod(ClientAuthenticationMethod.NONE) // 认证方式 .authorizationGrantType(AuthorizationGrantType.AUTHORIZATION_CODE) // 授权码模式 .authorizationGrantType(AuthorizationGrantType.REFRESH_TOKEN) // 允许刷新令牌 .redirectUri("http://localhost:8088/code") // 认证成功后的回调地址 .postLogoutRedirectUri("http://localhost:8088/") // 退出后的回调地址 .scope(OidcScopes.OPENID) // 启用 OpenID 作用域 .scope(OidcScopes.PROFILE) // 允许访问用户基本信息 .clientSettings( ClientSettings.builder() .requireAuthorizationConsent(true) .requireProofKey(true) // 关键配置:强制客户端使用 PKCE 进行授权 .build()) // 需要用户授权 .tokenSettings(TokenSettings.builder() .accessTokenTimeToLive(Duration.ofMinutes(30)) // 设置访问令牌过期时间为 30 分钟 .refreshTokenTimeToLive(Duration.ofDays(1)) // 设置刷新令牌过期时间为 1 天 .reuseRefreshTokens(true) .idTokenSignatureAlgorithm(SignatureAlgorithm.RS256) // 设置 ID 令牌签名算法为 RS256 .accessTokenFormat(OAuth2TokenFormat.SELF_CONTAINED) // 设置访问令牌格式为 JWT .build()) .build(); RegisteredClient passwordClient = RegisteredClient.withId(UUID.randomUUID().toString()) .clientName("自定义密码模式客户端") .clientId("password-client") // 客户端 ID .clientSecret(passwordEncoder.encode("secret2")) // 客户端密钥(加密) .clientAuthenticationMethod(ClientAuthenticationMethod.CLIENT_SECRET_BASIC) // 认证方式 .authorizationGrantType(new AuthorizationGrantType("password")) // 密码模式 .authorizationGrantType(AuthorizationGrantType.REFRESH_TOKEN) // 允许刷新令牌 .redirectUri("http://localhost:8088/code") // 认证成功后的回调地址 .postLogoutRedirectUri("http://localhost:8088/") // 退出后的回调地址 .scope(OidcScopes.OPENID) // 启用 OpenID 作用域 .scope(OidcScopes.PROFILE) // 允许访问用户基本信息 .clientSettings(ClientSettings.builder().requireAuthorizationConsent(true).build()) // 需要用户授权 .tokenSettings(TokenSettings.builder() .accessTokenTimeToLive(Duration.ofMinutes(30)) // 设置访问令牌过期时间为 30 分钟 .refreshTokenTimeToLive(Duration.ofDays(1)) // 设置刷新令牌过期时间为 1 天 .reuseRefreshTokens(true) .idTokenSignatureAlgorithm(SignatureAlgorithm.RS256) // 设置 ID 令牌签名算法为 RS256 .accessTokenFormat(OAuth2TokenFormat.SELF_CONTAINED) // 设置访问令牌格式为 JWT .build()) .build(); // 保存到数据库 registeredClientRepository.save(oidcClient); registeredClientRepository.save(mobileClient); registeredClientRepository.save(passwordClient); } return registeredClientRepository; } /** * 授权信息(存储在数据库中) * 对应表:oauth2_authorization */ @Bean public OAuth2AuthorizationService authorizationService(JdbcTemplate jdbcTemplate, RegisteredClientRepository registeredClientRepository) { return new JdbcOAuth2AuthorizationService(jdbcTemplate, registeredClientRepository); } /** * 授权确认(存储在数据库中) *对应表:oauth2_authorization_consent */ @Bean public OAuth2AuthorizationConsentService authorizationConsentService(JdbcTemplate jdbcTemplate, RegisteredClientRepository registeredClientRepository) { return new JdbcOAuth2AuthorizationConsentService(jdbcTemplate, registeredClientRepository); } /** * 配置用户自定义的 JWT 令牌自定义器,自定义 claims 信息 * * @return UserDetailsService 用户信息服务 */ @Bean public OAuth2TokenCustomizer<JwtEncodingContext> jwtTokenCustomizer() { return new CustomTokenCustomizer(); } /** * 配置 JSON Web Key (JWK) 源,用于 JWT 令牌签名和验证 * * @return JWKSource<SecurityContext> JWK 源 */ @Bean public JWKSource<SecurityContext> jwkSource() { // 自动生成 RSA 密钥对 KeyPair keyPair = generateRsaKey(); // 生成 RSA 密钥对 RSAPublicKey publicKey = (RSAPublicKey) keyPair.getPublic(); RSAPrivateKey privateKey = (RSAPrivateKey) keyPair.getPrivate(); /* // 手动配置 RSA 公钥和私钥 String privateKeyPEM = "-----BEGIN PRIVATE KEY-----\n...12s3a1f3as...\n-----END PRIVATE KEY-----"; String publicKeyPEM = "-----BEGIN PUBLIC KEY-----\n...eeeeeeeeeqqqqqqqq1123123123...\n-----END PUBLIC KEY-----"; // 解析公钥和私钥 try { publicKey = (RSAPublicKey) parsePublicKey(publicKeyPEM); privateKey = (RSAPrivateKey) parsePrivateKey(privateKeyPEM); } catch (Exception e) { e.printStackTrace(); }*/ // 构建 RSA JWK RSAKey rsaKey = new RSAKey.Builder(publicKey) .privateKey(privateKey) .keyID(UUID.randomUUID().toString()) .build(); // 将 JWK 存储到 JWKSet JWKSet jwkSet = new JWKSet(rsaKey); return new ImmutableJWKSet<>(jwkSet); } public static PublicKey parsePublicKey(String pem) throws Exception { String publicKeyPEM = pem.replace("-----BEGIN PUBLIC KEY-----", "") .replace("-----END PUBLIC KEY-----", "") .replaceAll("\\s", ""); // 移除换行和空格 byte[] decoded = Base64.getDecoder().decode(publicKeyPEM); X509EncodedKeySpec keySpec = new X509EncodedKeySpec(decoded); KeyFactory keyFactory = KeyFactory.getInstance("RSA"); return keyFactory.generatePublic(keySpec); } public static PrivateKey parsePrivateKey(String pem) throws Exception { String privateKeyPEM = pem.replace("-----BEGIN PRIVATE KEY-----", "") .replace("-----END PRIVATE KEY-----", "") .replaceAll("\\s", ""); // 移除换行和空格 byte[] decoded = Base64.getDecoder().decode(privateKeyPEM); PKCS8EncodedKeySpec keySpec = new PKCS8EncodedKeySpec(decoded); KeyFactory keyFactory = KeyFactory.getInstance("RSA"); return keyFactory.generatePrivate(keySpec); } /** * 配置 OAuth2 授权服务器的基本设置 * * @return AuthorizationServerSettings 授权服务器设置 */ @Bean public AuthorizationServerSettings authorizationServerSettings() { return AuthorizationServerSettings.builder() .issuer("http://localhost:8088/") // 设置令牌签发者(issuer) .tokenEndpoint("/oauth2/token") // 设置令牌端点地址 .authorizationEndpoint("/oauth2/authorize") // 设置授权端点地址 .jwkSetEndpoint("/oauth2/jwks") // 设置 JWK 端点地址 .build(); } private KeyPair generateRsaKey() { try { KeyPairGenerator keyPairGenerator = KeyPairGenerator.getInstance("RSA"); keyPairGenerator.initialize(2048); return keyPairGenerator.generateKeyPair(); } catch (Exception e) { throw new IllegalStateException("无法生成 RSA 密钥对", e); } } /** *配置token生成器,这里用于自定义模式生成JwtToken */ @Bean OAuth2TokenGenerator<?> tokenGenerator(JWKSource<SecurityContext> jwkSource) { JwtGenerator jwtGenerator = new JwtGenerator(new NimbusJwtEncoder(jwkSource)); jwtGenerator.setJwtCustomizer(new CustomTokenCustomizer()); // 配置用户自定义的 JWT 令牌自定义器,自定义 claims 信息 OAuth2AccessTokenGenerator accessTokenGenerator = new OAuth2AccessTokenGenerator(); OAuth2RefreshTokenGenerator refreshTokenGenerator = new OAuth2RefreshTokenGenerator(); return new DelegatingOAuth2TokenGenerator( jwtGenerator, accessTokenGenerator, refreshTokenGenerator); } /** * 配置密码模式认证提供者 */ @Bean public PasswordEncoder passwordEncoder() { return new BCryptPasswordEncoder(); } }
下面是单独挑重点说明
3.1 如果想通过客户端区分登录页,这里就可以直接继承 AuthenticationEntryPoint
public class ClientAwareAuthenticationEntryPoint implements AuthenticationEntryPoint {

    @Override
    public void commence(HttpServletRequest request, HttpServletResponse response,
                         AuthenticationException authException) throws IOException {
        String clientId = request.getParameter("client_id");  // 提取客户端标识
        System.out.println("进来了:"+clientId);
        if (clientId != null) {
            try {
                if(clientId.equals("oidc-client"))
                    response.sendRedirect("/login");  // web登录页
                else
                    response.sendRedirect("/home");  // 移动端登录页

                return;
            } catch (Exception ignored) {
                ignored.printStackTrace();
            }
        }
        response.sendRedirect("/login");  // 默认登录页
    }
}
    @Bean
    @Order(1) // 指定过滤器链的优先级,授权服务器的安全配置优先
    public SecurityFilterChain authorizationServerSecurityFilterChain(HttpSecurity http, OAuth2AuthorizationService authorizationService,
                                                                      OAuth2TokenGenerator<?> tokenGenerator)
            throws Exception {
        // 创建 OAuth2 授权服务器的配置
        OAuth2AuthorizationServerConfigurer authorizationServerConfigurer =
                OAuth2AuthorizationServerConfigurer.authorizationServer();

        http
                /*其他配置*/


               // 未认证时,HTML 请求重定向到 /login 页面
                .exceptionHandling((exceptions) -> exceptions
                        .defaultAuthenticationEntryPointFor(
                                //new LoginUrlAuthenticationEntryPoint("/login"),
                                new ClientAwareAuthenticationEntryPoint(), //根据客户端id自定义跳转登录界面
                                new MediaTypeRequestMatcher(MediaType.TEXT_HTML)
                        )
                        .authenticationEntryPoint(new CustomAuthenticationEntryPoint())
                )


        ;

        return http.build(); // 构建安全过滤器链
    }
3.2 如果在JWT生成token时想自定义Claims声明信息
import org.springframework.security.oauth2.jwt.JwtClaimsSet;
import org.springframework.security.oauth2.server.authorization.token.JwtEncodingContext;
import org.springframework.security.oauth2.server.authorization.token.OAuth2TokenCustomizer;

import java.util.HashMap;
import java.util.Map;


public class CustomTokenCustomizer implements OAuth2TokenCustomizer<JwtEncodingContext> {

    @Override
    public void customize(JwtEncodingContext context) {
        JwtClaimsSet.Builder claims = context.getClaims();

        // 获取当前认证的用户信息
        // 这里可以根据实际情况从 Authentication 对象中获取更多信息
        String username = context.getPrincipal().getName();

        // 添加自定义的声明信息
        Map<String, Object> customClaims = new HashMap<>();
        customClaims.put("custom_claim", "This is a custom claim");
        customClaims.put("username", username);

        // 将自定义声明信息添加到 JWT 声明中
        claims.claims(existingClaims -> existingClaims.putAll(customClaims));
    }
}
在SecurityConfig需要注册进去
    /**
     * 配置用户自定义的 JWT 令牌自定义器,自定义 claims 信息
     *
     * @return UserDetailsService 用户信息服务
     */
    @Bean
    public OAuth2TokenCustomizer<JwtEncodingContext> jwtTokenCustomizer() {
        return new CustomTokenCustomizer();
    }
3.3 自定义密码登录
添加自定义密码模式常量
public class OAuth2Constant {
    /**
     * 密码模式(自定义)
     */
    public static final String GRANT_TYPE_PASSWORD = "authorization_password";
    /**
     * 构造方法私有化
     */
    private OAuth2Constant(){
    }
}
添加 PasswordGrantAuthenticationConverter 继承 AuthenticationConverter. 初步校验参数,过滤掉不需要的参数,将参数传递给下面的PasswordGrantAuthenticationProvider 进行数据校验和token签发
import com.example.springbootdemo.constant.OAuth2Constant;
import jakarta.servlet.http.HttpServletRequest;
import org.springframework.lang.Nullable;
import org.springframework.security.core.Authentication;
import org.springframework.security.core.context.SecurityContextHolder;
import org.springframework.security.oauth2.core.OAuth2AuthenticationException;
import org.springframework.security.oauth2.core.endpoint.OAuth2ParameterNames;
import org.springframework.security.web.authentication.AuthenticationConverter;
import org.springframework.util.LinkedMultiValueMap;
import org.springframework.util.MultiValueMap;
import org.springframework.util.StringUtils;
import java.util.HashMap;
import java.util.Map;

public class PasswordGrantAuthenticationConverter implements AuthenticationConverter {

    @Nullable
    @Override
    public Authentication convert(HttpServletRequest request) {
        // grant_type (REQUIRED)
        String grantType = request.getParameter(OAuth2ParameterNames.GRANT_TYPE);
        if (!OAuth2Constant.GRANT_TYPE_PASSWORD.equals(grantType)) {
            return null;
        }

        Authentication clientPrincipal = SecurityContextHolder.getContext().getAuthentication();

        //从request中提取请求参数,然后存入MultiValueMap<String, String>
        MultiValueMap<String, String> parameters = getParameters(request);

        // username (REQUIRED)
        String username = parameters.getFirst(OAuth2ParameterNames.USERNAME);
        if (!StringUtils.hasText(username) ||
                parameters.get(OAuth2ParameterNames.USERNAME).size() != 1) {
            throw new OAuth2AuthenticationException("无效请求,用户名不能为空!");
        }
        String password = parameters.getFirst(OAuth2ParameterNames.PASSWORD);
        if (!StringUtils.hasText(password) ||
                parameters.get(OAuth2ParameterNames.PASSWORD).size() != 1) {
            throw new OAuth2AuthenticationException("无效请求,密码不能为空!");
        }

        //收集要传入PasswordGrantAuthenticationToken构造方法的参数,
        //该参数接下来在PasswordGrantAuthenticationProvider中使用
        Map<String, Object> additionalParameters = new HashMap<>();
        //遍历从request中提取的参数,排除掉grant_type、client_id、code等字段参数,其他参数收集到additionalParameters中
        parameters.forEach((key, value) -> {
            if (!key.equals(OAuth2ParameterNames.GRANT_TYPE) &&
                    !key.equals(OAuth2ParameterNames.CLIENT_ID) &&
                    !key.equals(OAuth2ParameterNames.CODE)) {
                additionalParameters.put(key, value.get(0));
            }
           // additionalParameters.put("abc", "123");
        });

        //返回自定义的PasswordGrantAuthenticationToken对象
        return new PasswordGrantAuthenticationToken(clientPrincipal, additionalParameters);
    }

    /**
     *从request中提取请求参数,然后存入MultiValueMap<String, String>
     */
    private static MultiValueMap<String, String> getParameters(HttpServletRequest request) {
        Map<String, String[]> parameterMap = request.getParameterMap();
        MultiValueMap<String, String> parameters = new LinkedMultiValueMap<>(parameterMap.size());
        parameterMap.forEach((key, values) -> {
            if (values.length > 0) {
                for (String value : values) {
                    parameters.add(key, value);
                }
            }
        });
        return parameters;
    }

}
添加 PasswordGrantAuthenticationToken 继承 OAuth2AuthorizationGrantAuthenticationToken.注册自定义密码模式
public class PasswordGrantAuthenticationToken extends OAuth2AuthorizationGrantAuthenticationToken {

    public PasswordGrantAuthenticationToken(Authentication clientPrincipal,
                                            @Nullable Map<String, Object> additionalParameters) {
        super(new AuthorizationGrantType(OAuth2Constant.GRANT_TYPE_PASSWORD),
                clientPrincipal, additionalParameters);
    }

}
添加PasswordGrantAuthenticationProvider 继承 AuthenticationProvider 。这个是核心部分,用于校验账号密码,jwt签发access token,refresh token, 还可以自定义返回给调用端参数(比如添加业务信息,移除传递上来的密码明文等等)。注意这里返回给前端密码不正确的提示信息可以用我注释掉的 OAuth2AuthenticationException 直接返回,想要自定义属性返回需要看下面3.4
import com.example.springbootdemo.filters.MyAuthenticationException;
import jakarta.annotation.Resource;
import org.apache.commons.logging.Log;
import org.apache.commons.logging.LogFactory;
import org.springframework.security.authentication.AuthenticationProvider;
import org.springframework.security.authentication.UsernamePasswordAuthenticationToken;
import org.springframework.security.core.Authentication;
import org.springframework.security.core.AuthenticationException;
import org.springframework.security.core.userdetails.UserDetails;
import org.springframework.security.core.userdetails.UserDetailsService;
import org.springframework.security.crypto.password.PasswordEncoder;
import org.springframework.security.oauth2.core.*;
import org.springframework.security.oauth2.core.endpoint.OAuth2ParameterNames;
import org.springframework.security.oauth2.jwt.*;
import org.springframework.security.oauth2.server.authorization.OAuth2Authorization;
import org.springframework.security.oauth2.server.authorization.OAuth2AuthorizationService;
import org.springframework.security.oauth2.server.authorization.OAuth2TokenType;
import org.springframework.security.oauth2.server.authorization.authentication.OAuth2AccessTokenAuthenticationToken;
import org.springframework.security.oauth2.server.authorization.authentication.OAuth2ClientAuthenticationToken;
import org.springframework.security.oauth2.server.authorization.client.RegisteredClient;
import org.springframework.security.oauth2.server.authorization.context.AuthorizationServerContextHolder;
import org.springframework.security.oauth2.server.authorization.token.*;
import org.springframework.util.Assert;

import java.security.Principal;
import java.util.HashMap;
import java.util.Map;
import java.util.Set;
import java.util.stream.Collectors;
import java.util.stream.Stream;


public class PasswordGrantAuthenticationProvider implements AuthenticationProvider {


    private static final String ERROR_URI = "https://datatracker.ietf.org/doc/html/rfc6749#section-5.2";
    @Resource
    private UserDetailsService userDetailsService;
    @Resource
    private PasswordEncoder passwordEncoder;

    private final OAuth2AuthorizationService authorizationService;

    private final OAuth2TokenGenerator<? extends OAuth2Token> tokenGenerator;
    private JwtGenerator jwtGenerator;


    private final Log logger = LogFactory.getLog(getClass());

    public PasswordGrantAuthenticationProvider(OAuth2AuthorizationService authorizationService
            ,OAuth2TokenGenerator<? extends OAuth2Token> tokenGenerator
    ){
        Assert.notNull(authorizationService, "authorizationService cannot be null");
        Assert.notNull(tokenGenerator, "tokenGenerator cannot be null");
        this.authorizationService = authorizationService;
        this.tokenGenerator = tokenGenerator;
    }

    @Override
    public Authentication authenticate(Authentication authentication) throws AuthenticationException {
        PasswordGrantAuthenticationToken passwordGrantAuthenticationToken =
                (PasswordGrantAuthenticationToken) authentication;

        Map<String, Object> additionalParameters = passwordGrantAuthenticationToken.getAdditionalParameters();
        //授权类型
        AuthorizationGrantType authorizationGrantType = passwordGrantAuthenticationToken.getGrantType();
        //用户名
        String username = (String)additionalParameters.get(OAuth2ParameterNames.USERNAME);
        //密码
        String password = (String)additionalParameters.get(OAuth2ParameterNames.PASSWORD);
        //请求参数权限范围
        String requestScopesStr = (String)additionalParameters.get(OAuth2ParameterNames.SCOPE);
        //请求参数权限范围专场集合
        Set<String> requestScopeSet = Stream.of(requestScopesStr.split(" ")).collect(Collectors.toSet());

        // Ensure the client is authenticated
        OAuth2ClientAuthenticationToken clientPrincipal =
                getAuthenticatedClientElseThrowInvalidClient(passwordGrantAuthenticationToken);
        RegisteredClient registeredClient = clientPrincipal.getRegisteredClient();

        // Ensure the client is configured to use this authorization grant type
        if (!registeredClient.getAuthorizationGrantTypes().contains(authorizationGrantType)) {
            throw new OAuth2AuthenticationException(OAuth2ErrorCodes.UNAUTHORIZED_CLIENT);
        }

        //校验用户名信息
        UserDetails userDetails = userDetailsService.loadUserByUsername(username);


        //if(!password.equals(userDetails.getPassword().replace("{noop}","")))
        if(!passwordEncoder.matches(password,userDetails.getPassword()))
        {
           /* OAuth2Error error = new OAuth2Error(OAuth2ErrorCodes.INVALID_GRANT, "密码不正确", ERROR_URI);
            throw new OAuth2AuthenticationException(error);*/
            throw new MyAuthenticationException("密码不正确!");
        }

        //由于在上面已验证过用户名、密码,现在构建一个已认证的对象UsernamePasswordAuthenticationToken
        UsernamePasswordAuthenticationToken usernamePasswordAuthenticationToken = UsernamePasswordAuthenticationToken.authenticated(userDetails,clientPrincipal,userDetails.getAuthorities());

        // Initialize the DefaultOAuth2TokenContext
        DefaultOAuth2TokenContext.Builder tokenContextBuilder = DefaultOAuth2TokenContext.builder()
                .registeredClient(registeredClient)
                .principal(usernamePasswordAuthenticationToken)
                .authorizationServerContext(AuthorizationServerContextHolder.getContext())
                .authorizationGrantType(authorizationGrantType)
                .authorizedScopes(requestScopeSet)
                .authorizationGrant(passwordGrantAuthenticationToken);

        // Initialize the OAuth2Authorization
        OAuth2Authorization.Builder authorizationBuilder = OAuth2Authorization.withRegisteredClient(registeredClient)
                .principalName(clientPrincipal.getName())
                .authorizedScopes(requestScopeSet)
                .attribute(Principal.class.getName(), usernamePasswordAuthenticationToken)
                .authorizationGrantType(authorizationGrantType);

// ✅ 添加自定义 Claims
        Map<String, Object> customClaims = new HashMap<>();
        customClaims.put("custom_claim_1", "value_1");
        customClaims.put("custom_claim_2", "value_2");
        authorizationBuilder.attribute("custom_claims", customClaims);
// ----- 生成 Access Token -----
        OAuth2TokenContext tokenContext = tokenContextBuilder
                .tokenType(OAuth2TokenType.ACCESS_TOKEN)
                .build();
       /* OAuth2Token generatedAccessToken = this.tokenGenerator.generate(tokenContext);*/
        OAuth2Token generatedAccessToken= tokenGenerator.generate(tokenContext);


        if (generatedAccessToken == null) {
            OAuth2Error error = new OAuth2Error(OAuth2ErrorCodes.SERVER_ERROR,
                    "The token generator failed to generate the access token.", ERROR_URI);
            throw new OAuth2AuthenticationException(error);
        }

        if (this.logger.isTraceEnabled()) {
            this.logger.trace("Generated access token");
        }
        OAuth2AccessToken  accessToken = new OAuth2AccessToken(OAuth2AccessToken.TokenType.BEARER,
                generatedAccessToken.getTokenValue(), generatedAccessToken.getIssuedAt(),
                generatedAccessToken.getExpiresAt(), tokenContext.getAuthorizedScopes());

        if (generatedAccessToken instanceof ClaimAccessor) {
            authorizationBuilder.token(accessToken, (metadata) ->
                    {
                        metadata.put(OAuth2Authorization.Token.CLAIMS_METADATA_NAME,((ClaimAccessor) generatedAccessToken).getClaims() );
                    });

        } else {
            authorizationBuilder.accessToken(accessToken);
        }

        // ----- Refresh token -----
        OAuth2RefreshToken refreshToken = null;
        if (registeredClient.getAuthorizationGrantTypes().contains(AuthorizationGrantType.REFRESH_TOKEN) &&
                // Do not issue refresh token to public client
                !clientPrincipal.getClientAuthenticationMethod().equals(ClientAuthenticationMethod.NONE)) {

            tokenContext = tokenContextBuilder.tokenType(OAuth2TokenType.REFRESH_TOKEN).build();
            OAuth2Token generatedRefreshToken = this.tokenGenerator.generate(tokenContext);
            if (!(generatedRefreshToken instanceof OAuth2RefreshToken)) {
                OAuth2Error error = new OAuth2Error(OAuth2ErrorCodes.SERVER_ERROR,
                        "The token generator failed to generate the refresh token.", ERROR_URI);
                throw new OAuth2AuthenticationException(error);
            }

            if (this.logger.isTraceEnabled()) {
                this.logger.trace("Generated refresh token");
            }

            refreshToken = (OAuth2RefreshToken) generatedRefreshToken;
            authorizationBuilder.refreshToken(refreshToken);
        }

        //保存认证信息
        OAuth2Authorization authorization = authorizationBuilder.build();
        this.authorizationService.save(authorization);

        if (this.logger.isTraceEnabled()) {
            this.logger.trace("Saved authorization");
        }

        if (this.logger.isTraceEnabled()) {
            this.logger.trace("Authenticated token request");
        }

        //控制自定义返回项  创建一个新的可变 Map 并复制原有的参数
        Map<String, Object> mutableAdditionalParameters = new HashMap<>(additionalParameters);
        // 移除密码参数
        mutableAdditionalParameters.remove(OAuth2ParameterNames.PASSWORD);
        mutableAdditionalParameters.put("test","123");

        return  new OAuth2AccessTokenAuthenticationToken(
                registeredClient, clientPrincipal, accessToken, refreshToken, mutableAdditionalParameters);
    }

    @Override
    public boolean supports(Class<?> authentication) {
        return PasswordGrantAuthenticationToken.class.isAssignableFrom(authentication);
    }

    private static OAuth2ClientAuthenticationToken getAuthenticatedClientElseThrowInvalidClient(Authentication authentication) {
        OAuth2ClientAuthenticationToken clientPrincipal = null;
        if (OAuth2ClientAuthenticationToken.class.isAssignableFrom(authentication.getPrincipal().getClass())) {
            clientPrincipal = (OAuth2ClientAuthenticationToken) authentication.getPrincipal();
        }
        if (clientPrincipal != null && clientPrincipal.isAuthenticated()) {
            return clientPrincipal;
        }
        throw new OAuth2AuthenticationException(OAuth2ErrorCodes.INVALID_CLIENT);
    }
}
SecurityConfig 注册自定义密码模式和相应的Bean
  /**
     * 配置 OAuth2 授权服务器的安全过滤器链
     *
     * @param http Spring Security 的 HttpSecurity 对象
     * @return SecurityFilterChain 安全过滤器链
     * @throws Exception 配置过程中可能抛出的异常
     */
    @Bean
    @Order(1) // 指定过滤器链的优先级,授权服务器的安全配置优先
    public SecurityFilterChain authorizationServerSecurityFilterChain(HttpSecurity http, OAuth2AuthorizationService authorizationService,
                                                                      OAuth2TokenGenerator<?> tokenGenerator)
            throws Exception {
        // 创建 OAuth2 授权服务器的配置
        OAuth2AuthorizationServerConfigurer authorizationServerConfigurer =
                OAuth2AuthorizationServerConfigurer.authorizationServer();

        http
                // 只匹配 OAuth2 授权服务器的相关端点
                .securityMatcher(authorizationServerConfigurer.getEndpointsMatcher())
                .with(authorizationServerConfigurer, (authorizationServer) ->
                        authorizationServer
                                //设置自定义密码模式
                                .tokenEndpoint(tokenEndpoint ->
                                        tokenEndpoint
                                                .accessTokenRequestConverter(
                                                        new PasswordGrantAuthenticationConverter())
                                                .authenticationProvider(
                                                        new PasswordGrantAuthenticationProvider(
                                                                authorizationService, tokenGenerator))
                                                .errorResponseHandler(new MyAuthenticationFailureHandler()) // 自定义认证失败处理器
                                )
                                .oidc(Customizer.withDefaults()) // 启用 OpenID Connect 1.0
                )
                // 任何请求都需要认证
                .authorizeHttpRequests((authorize) ->
                        authorize
                                .anyRequest().authenticated()
                )
                .with(authorizationServerConfigurer, customizer -> customizer.oidc(Customizer.withDefaults()))  // 启用 OIDC(可选)
               // 未认证时,HTML 请求重定向到 /login 页面
                .exceptionHandling((exceptions) -> exceptions
                        .defaultAuthenticationEntryPointFor(
                                //new LoginUrlAuthenticationEntryPoint("/login"),
                                new ClientAwareAuthenticationEntryPoint(), //根据客户端id自定义跳转登录界面
                                new MediaTypeRequestMatcher(MediaType.TEXT_HTML)
                        )
                        .authenticationEntryPoint(new CustomAuthenticationEntryPoint())
                )


        ;

        return http.build(); // 构建安全过滤器链
    }
    /**
     *配置token生成器,这里用于自定义模式生成JwtToken
     */
    @Bean
    OAuth2TokenGenerator<?> tokenGenerator(JWKSource<SecurityContext> jwkSource) {
        JwtGenerator jwtGenerator = new JwtGenerator(new NimbusJwtEncoder(jwkSource));
        jwtGenerator.setJwtCustomizer(new CustomTokenCustomizer()); // 配置用户自定义的 JWT 令牌自定义器,自定义 claims 信息
        OAuth2AccessTokenGenerator accessTokenGenerator = new OAuth2AccessTokenGenerator();
        OAuth2RefreshTokenGenerator refreshTokenGenerator = new OAuth2RefreshTokenGenerator();
        return new DelegatingOAuth2TokenGenerator(
                jwtGenerator, accessTokenGenerator, refreshTokenGenerator);
    }
    /**
     * 配置密码模式认证提供者
     */
    @Bean
    public PasswordEncoder passwordEncoder() {
        return new BCryptPasswordEncoder();
    }
3.4 一般参数不对就会跳转到登录界面,或者密码错误会返回OAuth固定的格式给前端,如果想返回自定义格式给前端,还需要配置一下过滤器进行拦截重写(如果不需要自定义格式,用上面3.3注释掉的OAuth2AuthenticationException 返回一样的)
public class CustomAuthenticationEntryPoint implements AuthenticationEntryPoint {

    private final ObjectMapper objectMapper = new ObjectMapper();

    @Override
    public void commence(HttpServletRequest request, HttpServletResponse response, AuthenticationException authException) throws IOException, ServletException {
        if(authException instanceof InsufficientAuthenticationException){
            String accept = request.getHeader("accept");
            if(accept.contains(MediaType.TEXT_HTML_VALUE)){
                //如果是html请求类型,则返回登录页
                LoginUrlAuthenticationEntryPoint loginUrlAuthenticationEntryPoint = new LoginUrlAuthenticationEntryPoint("/login");
                loginUrlAuthenticationEntryPoint.commence(request,response,authException);
            }else {
                //如果是api请求类型,则返回json
                ResponseResult.exceptionResponse(response,"需要带上令牌进行访问");
            }
        }else if(authException instanceof InvalidBearerTokenException){
            ResponseResult.exceptionResponse(response,"令牌无效或已过期");
        }else{
            ResponseResult.exceptionResponse(response,authException);
        }
    }
}
public class MyAuthenticationException extends AuthenticationException {
    public MyAuthenticationException(String msg) {
        super(msg);
    }

}
public class MyAuthenticationFailureHandler implements AuthenticationFailureHandler {
    @Override
    public void onAuthenticationFailure(HttpServletRequest request, HttpServletResponse response, AuthenticationException exception) throws IOException, ServletException {
        ResponseResult.exceptionResponse(response,exception);
    }
}
import lombok.Getter;

@Getter
public enum ResultCodeEnum {

    SUCCESS(200,"成功"),
    FAIL(201, "失败");

    private Integer code;
    private String message;

    private ResultCodeEnum(Integer code, String message) {
        this.code = code;
        this.message = message;
    }
}
import com.nimbusds.jose.shaded.gson.Gson;
import jakarta.servlet.http.HttpServletResponse;
import lombok.Data;
import org.springframework.http.MediaType;
import org.springframework.security.access.AccessDeniedException;
import org.springframework.security.core.AuthenticationException;
import org.springframework.security.oauth2.core.OAuth2AuthenticationException;

import java.io.IOException;
import java.nio.charset.StandardCharsets;

@Data
public class ResponseResult<T> {

    /**
     * 状态码
     */
    private Integer code;
    /**
     * 返回信息
     */
    private String message;
    /**
     * 数据
     */
    private T data;

    private ResponseResult() {
    }


    public static <T> ResponseResult<T> build(T body, ResultCodeEnum resultCodeEnum) {
        ResponseResult<T> result = new ResponseResult<>();
        //封装数据
        if (body != null) {
            result.setData(body);
        }
        //状态码
        result.setCode(resultCodeEnum.getCode());
        //返回信息
        result.setMessage(resultCodeEnum.getMessage());
        return result;
    }


    public static <T> ResponseResult<T> ok() {
        return build(null, ResultCodeEnum.SUCCESS);
    }


    public static <T> ResponseResult<T> ok(T data) {
        return build(data, ResultCodeEnum.SUCCESS);
    }

    public static <T> ResponseResult<T> fail() {
        return build(null, ResultCodeEnum.FAIL);
    }

    public static <T> ResponseResult<T> fail(T data) {
        return build(data, ResultCodeEnum.FAIL);
    }

    public ResponseResult<T> message(String msg) {
        this.setMessage(msg);
        return this;
    }

    public ResponseResult<T> code(Integer code) {
        this.setCode(code);
        return this;
    }

    public static void exceptionResponse(HttpServletResponse response, Exception e) throws AccessDeniedException, AuthenticationException, IOException {

        String message = null;
        if (e instanceof OAuth2AuthenticationException o) {
            message = o.getError().getDescription();
        } else {
            message = e.getMessage();
        }
        exceptionResponse(response, message);
    }

    public static void exceptionResponse(HttpServletResponse response, String message) throws AccessDeniedException, AuthenticationException, IOException {

        ResponseResult responseResult = ResponseResult.fail(message);
        Gson gson = new Gson();
        String jsonResult = gson.toJson(responseResult);
        response.setStatus(HttpServletResponse.SC_OK);
        response.setContentType(MediaType.APPLICATION_JSON_VALUE);
        //response.setCharacterEncoding(Charsets.UTF_8.name());
        response.setCharacterEncoding(StandardCharsets.UTF_8.name());
        response.getWriter().print(jsonResult);

    }
}
最后在SecurityConfig 中authorizationServerSecurityFilterChain 和defaultSecurityFilterChain进行配置
/** * 配置 OAuth2 授权服务器的安全过滤器链 * * @param http Spring Security 的 HttpSecurity 对象 * @return SecurityFilterChain 安全过滤器链 * @throws Exception 配置过程中可能抛出的异常 */ @Bean @Order(1) // 指定过滤器链的优先级,授权服务器的安全配置优先 public SecurityFilterChain authorizationServerSecurityFilterChain(HttpSecurity http, OAuth2AuthorizationService authorizationService, OAuth2TokenGenerator<?> tokenGenerator) throws Exception { // 创建 OAuth2 授权服务器的配置 OAuth2AuthorizationServerConfigurer authorizationServerConfigurer = OAuth2AuthorizationServerConfigurer.authorizationServer(); http // 只匹配 OAuth2 授权服务器的相关端点 .securityMatcher(authorizationServerConfigurer.getEndpointsMatcher()) .with(authorizationServerConfigurer, (authorizationServer) -> authorizationServer //设置自定义密码模式 .tokenEndpoint(tokenEndpoint -> tokenEndpoint .accessTokenRequestConverter( new PasswordGrantAuthenticationConverter()) .authenticationProvider( new PasswordGrantAuthenticationProvider( authorizationService, tokenGenerator)) .errorResponseHandler(new MyAuthenticationFailureHandler()) // 自定义认证失败处理器 ) .oidc(Customizer.withDefaults()) // 启用 OpenID Connect 1.0 ) // 任何请求都需要认证 .authorizeHttpRequests((authorize) -> authorize .anyRequest().authenticated() ) .with(authorizationServerConfigurer, customizer -> customizer.oidc(Customizer.withDefaults())) // 启用 OIDC(可选) // 未认证时,HTML 请求重定向到 /login 页面 .exceptionHandling((exceptions) -> exceptions .defaultAuthenticationEntryPointFor( //new LoginUrlAuthenticationEntryPoint("/login"), new ClientAwareAuthenticationEntryPoint(), //根据客户端id自定义跳转登录界面 new MediaTypeRequestMatcher(MediaType.TEXT_HTML) ) .authenticationEntryPoint(new CustomAuthenticationEntryPoint()) ) ; return http.build(); // 构建安全过滤器链 } /** * 配置默认的 Spring Security 过滤器链,处理用户身份认证 * * @param http Spring Security 的 HttpSecurity 对象 * @return SecurityFilterChain 安全过滤器链 * @throws Exception 配置过程中可能抛出的异常 */ @Bean @Order(2) // 低于授权服务器的过滤器链优先级 public SecurityFilterChain defaultSecurityFilterChain(HttpSecurity http) throws Exception { http //.csrf(csrf -> csrf.disable()) // 禁用 CSRF(移动端无 Cookie 场景) // 任何请求都需要认证 .authorizeHttpRequests((authorize) -> authorize .requestMatchers("/auth/login", "/api/auth/refresh","/home","/login/**").permitAll() .anyRequest().authenticated() ) // 使用 Spring Security 默认的表单登录 //.formLogin(Customizer.withDefaults()); // 使用自定义表单登录配置 .formLogin(form -> form .loginPage("/login") // // 默认登录页 .permitAll() // 允许所有用户访问登录页 ) .oauth2ResourceServer((resourceServer) -> resourceServer .jwt(Customizer.withDefaults()) .authenticationEntryPoint(new CustomAuthenticationEntryPoint()) // 自定义认证失败处理器 ); return http.build(); }
4. 最后测试
1. 测试授权码模式。web端登录授权
先获取code授权码,将这一串放在浏览器跳转至登录界面授权


这里将拿到的code用来换取token.注意如果后端配置了 CLIENT_SECRET_BASIC 就需要在请求头通过clientid 和secret进行加密。postman 可以直接输入账号进行加密,前端调用需要自己进行base64编码{clientid}:{secret} ,然后放入到请求头中
.clientAuthenticationMethod(ClientAuthenticationMethod.CLIENT_SECRET_BASIC) // 认证方式
Authorization:Basic {编码后字符串}"


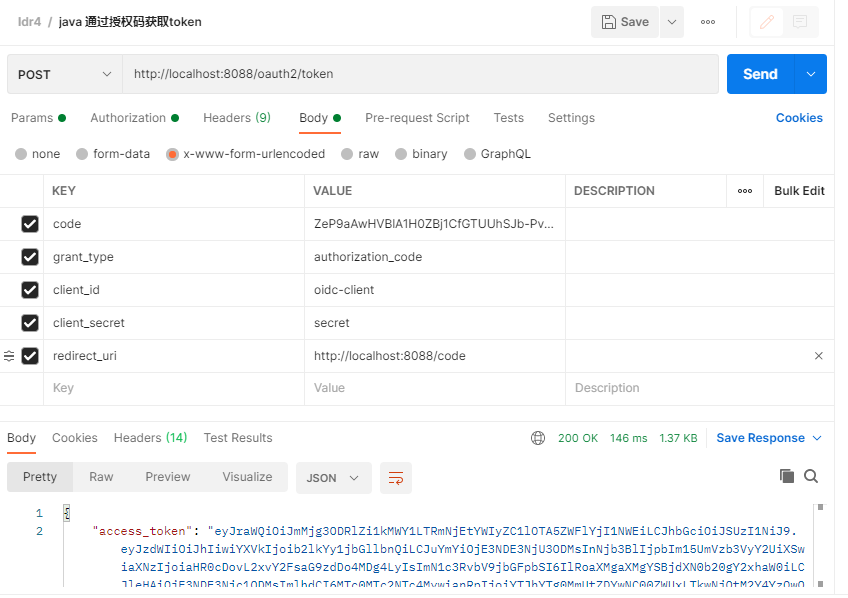
2. 测试授权码+pkce模式。移动端登录授权
需要在上面客户端配置中开启pkce,也不需要配置 clientSecret,认证方式也不需要了
RegisteredClient mobileClient = RegisteredClient.withId(UUID.randomUUID().toString())
                .clientId("mobile-client") // 客户端 ID
                .clientName("授权码+PKCE客户端")
                .clientAuthenticationMethod(ClientAuthenticationMethod.NONE) // 认证方式
                .authorizationGrantType(AuthorizationGrantType.AUTHORIZATION_CODE) // 授权码模式
                .authorizationGrantType(AuthorizationGrantType.REFRESH_TOKEN) // 允许刷新令牌
                .redirectUri("http://localhost:8088/code") // 认证成功后的回调地址
                .postLogoutRedirectUri("http://localhost:8088/") // 退出后的回调地址
                .scope(OidcScopes.OPENID) // 启用 OpenID 作用域
                .scope(OidcScopes.PROFILE) // 允许访问用户基本信息
                .clientSettings(
                        ClientSettings.builder()
                                .requireAuthorizationConsent(true)
                                .requireProofKey(true) // 关键配置:强制客户端使用 PKCE 进行授权
                                .build()) // 需要用户授权
                .tokenSettings(TokenSettings.builder()
                        .accessTokenTimeToLive(Duration.ofMinutes(30)) // 设置访问令牌过期时间为 30 分钟
                        .refreshTokenTimeToLive(Duration.ofDays(1)) // 设置刷新令牌过期时间为 1 天
                        .reuseRefreshTokens(true)
                        .idTokenSignatureAlgorithm(SignatureAlgorithm.RS256) // // 设置 ID 令牌签名算法为 RS256
                        .accessTokenFormat(OAuth2TokenFormat.SELF_CONTAINED) // 设置访问令牌格式为 JWT
                        .build())
                .build();
这里和授权码模式很像,上面授权码后面拿token需要传递clientSecret,但是在移动端配置clientSecret是很容易泄露的(第一种web端可以存储在服务端进行交互),返回的code也容易被拦截,所以就需要 换一种安全的方式进行授权,每次跳转到登录页面之前把 通过code_verifier加密后的code_challenge传递给认证服务器


最后换取token的时候需要带上code_verifier,授权服务器就会将当前code_verifier进行加密和开始跳转登录之前传递的code_challenge进行对比,就算code泄露了,只要这里对不上也会认证失败

如果不知道怎么生成code_verifier和code_challenge,可以通过这段代码生成
/**
     * 生成PKCE 对应的codeVerifier和codeChallenge
     * @return
     */
    @GetMapping("/login/pkce")
    public String pkce() {
        try {
            //生成code_verifier
            String codeVerifier = codeVerifierGenerator();
            //生成code_challenge
            String codeChallenge = codeChallengeGenerator(codeVerifier);

            System.out.println("code_verifier:"+codeVerifier);
            System.out.println("code_challenge:"+codeChallenge);
        }
        catch (Exception e) {
            e.printStackTrace();
        }

        return "pkce";  // 返回home.html模板
    }
    public static String codeVerifierGenerator(){
        return  Base64URL.encode(UUID.randomUUID().toString()).toString();
    }


    public static String codeChallengeGenerator(String codeVerifier) throws NoSuchAlgorithmException {
        MessageDigest messageDigest = MessageDigest.getInstance("SHA-256");
        byte[] digestCodeVerifier = messageDigest.digest(codeVerifier.getBytes(StandardCharsets.US_ASCII));
        return Base64URL.encode(digestCodeVerifier).toString();
    }
3. 自定义密码模式。适用于手机号验证码登录,小程序登录等等。
有些程序不会让用户输入账号密码,可以直接通过短信进行校验,如果是新用户直接先执行添加注册逻辑(这里省略了),再返回token,如果是注册过的用户就只需要校验验证码直接颁发token

5. 将客户端信息存储在数据库中
上面的例子都是基于内存存储的,如果重启服务器,那么都会重置客户端信息,也会清空用户的确认授权信息。这里将客户端及相关信息存储在数据库中
创建数据库表,我这里测试就放在上面用户一个表中了
/**
 * 客户端信息表
 */
CREATE TABLE oauth2_registered_client (
        id varchar(100) NOT NULL,
        client_id varchar(100) NOT NULL,
        client_id_issued_at datetime DEFAULT CURRENT_TIMESTAMP NOT NULL,
        client_secret varchar(200) DEFAULT NULL,
        client_secret_expires_at datetime DEFAULT NULL,
        client_name varchar(200) NOT NULL,
        client_authentication_methods varchar(1000) NOT NULL,
        authorization_grant_types varchar(1000) NOT NULL,
        redirect_uris varchar(1000) DEFAULT NULL,
        post_logout_redirect_uris varchar(1000) DEFAULT NULL,
        scopes varchar(1000) NOT NULL,
        client_settings varchar(2000) NOT NULL,
        token_settings varchar(2000) NOT NULL,
        PRIMARY KEY (id)
        );

/**
 * 授权确认表
 */
        CREATE TABLE oauth2_authorization_consent (
        registered_client_id varchar(100) NOT NULL,
        principal_name varchar(200) NOT NULL,
        authorities varchar(1000) NOT NULL,
        PRIMARY KEY (registered_client_id, principal_name)
        );

/**
 * 授权信息表
 */
        CREATE TABLE oauth2_authorization (
        id varchar(100) NOT NULL,
        registered_client_id varchar(100) NOT NULL,
        principal_name varchar(200) NOT NULL,
        authorization_grant_type varchar(100) NOT NULL,
        authorized_scopes varchar(1000) DEFAULT NULL,
        attributes blob DEFAULT NULL,
        state varchar(500) DEFAULT NULL,
        authorization_code_value blob DEFAULT NULL,
        authorization_code_issued_at datetime DEFAULT NULL,
        authorization_code_expires_at datetime DEFAULT NULL,
        authorization_code_metadata blob DEFAULT NULL,
        access_token_value blob DEFAULT NULL,
        access_token_issued_at datetime DEFAULT NULL,
        access_token_expires_at datetime DEFAULT NULL,
        access_token_metadata blob DEFAULT NULL,
        access_token_type varchar(100) DEFAULT NULL,
        access_token_scopes varchar(1000) DEFAULT NULL,
        oidc_id_token_value blob DEFAULT NULL,
        oidc_id_token_issued_at datetime DEFAULT NULL,
        oidc_id_token_expires_at datetime DEFAULT NULL,
        oidc_id_token_metadata blob DEFAULT NULL,
        refresh_token_value blob DEFAULT NULL,
        refresh_token_issued_at datetime DEFAULT NULL,
        refresh_token_expires_at datetime DEFAULT NULL,
        refresh_token_metadata blob DEFAULT NULL,
        user_code_value blob DEFAULT NULL,
        user_code_issued_at datetime DEFAULT NULL,
        user_code_expires_at datetime DEFAULT NULL,
        user_code_metadata blob DEFAULT NULL,
        device_code_value blob DEFAULT NULL,
        device_code_issued_at datetime DEFAULT NULL,
        device_code_expires_at datetime DEFAULT NULL,
        device_code_metadata blob DEFAULT NULL,
        PRIMARY KEY (id)
        );
新增客户端语句
INSERT INTO oauth2_registered_client (`id`, `client_id`, `client_id_issued_at`, `client_secret`, `client_secret_expires_at`, `client_name`, `client_authentication_methods`, `authorization_grant_types`, `redirect_uris`, `post_logout_redirect_uris`, `scopes`, `client_settings`, `token_settings`) VALUES ('3eacac0e-0de9-4727-9a64-6bdd4be2ee1f', 'oidc-client', '2023-07-12 07:33:42', '{noop}secret', NULL, '3eacac0e-0de9-4727-9a64-6bdd4be2ee1f', 'client_secret_basic', 'refresh_token,authorization_code', 'http://localhost:8088/code', 'http://localhost:8088/', 'openid,profile,myResource', '{\"@class\":\"java.util.Collections$UnmodifiableMap\",\"settings.client.require-proof-key\":false,\"settings.client.require-authorization-consent\":true}', '{\"@class\":\"java.util.Collections$UnmodifiableMap\",\"settings.token.reuse-refresh-tokens\":true,\"settings.token.id-token-signature-algorithm\":[\"org.springframework.security.oauth2.jose.jws.SignatureAlgorithm\",\"RS256\"],\"settings.token.access-token-time-to-live\":[\"java.time.Duration\",300.000000000],\"settings.token.access-token-format\":{\"@class\":\"org.springframework.security.oauth2.server.authorization.settings.OAuth2TokenFormat\",\"value\":\"self-contained\"},\"settings.token.refresh-token-time-to-live\":[\"java.time.Duration\",3600.000000000],\"settings.token.authorization-code-time-to-live\":[\"java.time.Duration\",300.000000000],\"settings.token.device-code-time-to-live\":[\"java.time.Duration\",300.000000000]}');
注意:这里{noop}secret 要改成密文,如果不知道密文是多少,可以直接通过代码生成打印出来。然后替换掉上面的{noop}secret
System.out.println(passwordEncoder().encode("明文"));
pom.xml添加配置,不添加运行会报错
<!-- 添加spring security cas支持 -->
        <dependency>
            <groupId>org.springframework.security</groupId>
            <artifactId>spring-security-cas</artifactId>
        </dependency>
这里改一下SecurityConfig就行了,这里只贴了更改的部分,把之前的写在内存的代码注释了
  /**
     * 配置 OAuth2 客户端信息(存储在内存中)
     *
     * @return RegisteredClientRepository OAuth2 客户端存储库
     */
/*    @Bean
    public RegisteredClientRepository registeredClientRepository() {
        // 配置一个 OpenID Connect (OIDC) 客户端
        RegisteredClient oidcClient = RegisteredClient.withId(UUID.randomUUID().toString())
                .clientName("OIDC客户端")
                .clientId("oidc-client") // 客户端 ID
                //.clientSecret("{noop}secret") // 客户端密钥(未加密)
                .clientSecret(passwordEncoder().encode("secret")) // 客户端密钥(加密)
                .clientAuthenticationMethod(ClientAuthenticationMethod.CLIENT_SECRET_BASIC) // 认证方式
                .authorizationGrantType(AuthorizationGrantType.AUTHORIZATION_CODE) // 授权码模式
                .authorizationGrantType(AuthorizationGrantType.REFRESH_TOKEN) // 允许刷新令牌
                .redirectUri("http://localhost:8088/code") // 认证成功后的回调地址
                .postLogoutRedirectUri("http://localhost:8088/") // 退出后的回调地址
                .scope(OidcScopes.OPENID) // 启用 OpenID 作用域
                .scope(OidcScopes.PROFILE) // 允许访问用户基本信息
                .scope("myResource") // 自定义作用域
                .clientSettings(ClientSettings.builder().requireAuthorizationConsent(true).build()) // 需要用户授权
                .tokenSettings(TokenSettings.builder()
                        .accessTokenTimeToLive(Duration.ofMinutes(30)) // 设置访问令牌过期时间为 30 分钟
                        .refreshTokenTimeToLive(Duration.ofDays(1)) // 设置刷新令牌过期时间为 1 天
                        .build())
                .build();
        RegisteredClient mobileClient = RegisteredClient.withId(UUID.randomUUID().toString())
                .clientId("mobile-client") // 客户端 ID
                .clientName("授权码+PKCE客户端")
                .clientAuthenticationMethod(ClientAuthenticationMethod.NONE) // 认证方式
                .authorizationGrantType(AuthorizationGrantType.AUTHORIZATION_CODE) // 授权码模式
                .authorizationGrantType(AuthorizationGrantType.REFRESH_TOKEN) // 允许刷新令牌
                .redirectUri("http://localhost:8088/code") // 认证成功后的回调地址
                .postLogoutRedirectUri("http://localhost:8088/") // 退出后的回调地址
                .scope(OidcScopes.OPENID) // 启用 OpenID 作用域
                .scope(OidcScopes.PROFILE) // 允许访问用户基本信息
                .clientSettings(
                        ClientSettings.builder()
                                .requireAuthorizationConsent(true)
                                .requireProofKey(true) // 关键配置:强制客户端使用 PKCE 进行授权
                                .build()) // 需要用户授权
                .tokenSettings(TokenSettings.builder()
                        .accessTokenTimeToLive(Duration.ofMinutes(30)) // 设置访问令牌过期时间为 30 分钟
                        .refreshTokenTimeToLive(Duration.ofDays(1)) // 设置刷新令牌过期时间为 1 天
                        .reuseRefreshTokens(true)
                        .idTokenSignatureAlgorithm(SignatureAlgorithm.RS256) // // 设置 ID 令牌签名算法为 RS256
                        .accessTokenFormat(OAuth2TokenFormat.SELF_CONTAINED) // 设置访问令牌格式为 JWT
                        .build())
                .build();
        RegisteredClient passwordClient = RegisteredClient.withId(UUID.randomUUID().toString())
                .clientName("自定义密码模式客户端")
                .clientId("password-client") // 客户端 ID
                .clientSecret(passwordEncoder().encode("secret2")) // 客户端密钥(加密)
                .clientAuthenticationMethod(ClientAuthenticationMethod.CLIENT_SECRET_BASIC) // 认证方式
                .authorizationGrantType(new AuthorizationGrantType(OAuth2Constant.GRANT_TYPE_PASSWORD)) // 密码模式
                .authorizationGrantType(AuthorizationGrantType.REFRESH_TOKEN) // 允许刷新令牌
                .redirectUri("http://localhost:8088/code") // 认证成功后的回调地址
                .postLogoutRedirectUri("http://localhost:8088/") // 退出后的回调地址
                .scope(OidcScopes.OPENID) // 启用 OpenID 作用域
                .scope(OidcScopes.PROFILE) // 允许访问用户基本信息
                .clientSettings(ClientSettings.builder().requireAuthorizationConsent(true).build()) // 需要用户授权
                .tokenSettings(TokenSettings.builder()
                        .accessTokenTimeToLive(Duration.ofMinutes(30)) // 设置访问令牌过期时间为 30 分钟
                        .refreshTokenTimeToLive(Duration.ofDays(1)) // 设置刷新令牌过期时间为 1 天
                        .reuseRefreshTokens(true)
                        .idTokenSignatureAlgorithm(SignatureAlgorithm.RS256) // // 设置 ID 令牌签名算法为 RS256
                        .accessTokenFormat(OAuth2TokenFormat.SELF_CONTAINED) // 设置访问令牌格式为 JWT
                        .build())
                .build();
        return new InMemoryRegisteredClientRepository(oidcClient,mobileClient,passwordClient); // 使用内存存储客户端信息,如果使用数据库存储,请使用 jpa 存储库继承 RegisteredClientRepository 实现
    }*/
    /**
     * 授权信息(存储在内存中)
     */
/*    @Bean
    public OAuth2AuthorizationService authorizationService(RegisteredClientRepository registeredClientRepository) {
        return new InMemoryOAuth2AuthorizationService();
    }*/
    /**
     * 客户端信息(存储在数据库中)
     * 对应表:oauth2_registered_client
     */
    @Bean
    public RegisteredClientRepository registeredClientRepository(JdbcTemplate jdbcTemplate) {
        System.out.println(passwordEncoder().encode("secret"));
        return new JdbcRegisteredClientRepository(jdbcTemplate);
    }
    /**
     * 授权信息(存储在数据库中)
     * 对应表:oauth2_authorization
     */
    @Bean
    public OAuth2AuthorizationService authorizationService(JdbcTemplate jdbcTemplate, RegisteredClientRepository registeredClientRepository) {
        return new JdbcOAuth2AuthorizationService(jdbcTemplate, registeredClientRepository);
    }
    /**
     * 授权确认(存储在数据库中)
     *对应表:oauth2_authorization_consent
     */
    @Bean
    public OAuth2AuthorizationConsentService authorizationConsentService(JdbcTemplate jdbcTemplate, RegisteredClientRepository registeredClientRepository) {
        return new JdbcOAuth2AuthorizationConsentService(jdbcTemplate, registeredClientRepository);
    }
重新执行上面授权码模式的代码,可以在数据库生成数据就说明成功了


当然,每次去手动添加客户端确实不好操作,所以可以优化一下,可以通过现有的客户端配置进行数据库初始化数据,每次运行判断数据库如果不存在客户端则进行初始化。注意,如果生产环境在已经生成数据后想改客户端配置,只能在数据库里面进行更改
    /**
     * 客户端信息(存储在数据库中,写入初始值的版本)
     * 对应表:oauth2_registered_client
     */
    @Bean
    public JdbcRegisteredClientRepository registeredClientRepository(DataSource dataSource, PasswordEncoder passwordEncoder) {
        JdbcRegisteredClientRepository registeredClientRepository = new JdbcRegisteredClientRepository(new JdbcTemplate(dataSource));

        // 检查数据库是否已存在客户端,若不存在则初始化
        if (registeredClientRepository.findByClientId("oidc-client") == null) {
            // 配置一个 OpenID Connect (OIDC) 客户端
            RegisteredClient oidcClient = RegisteredClient.withId(UUID.randomUUID().toString())
                    .clientName("OIDC客户端")
                    .clientId("oidc-client") // 客户端 ID
                    .clientSecret(passwordEncoder.encode("secret")) // 客户端密钥(加密)
                    .clientAuthenticationMethod(ClientAuthenticationMethod.CLIENT_SECRET_BASIC) // 认证方式
                    .authorizationGrantType(AuthorizationGrantType.AUTHORIZATION_CODE) // 授权码模式
                    .authorizationGrantType(AuthorizationGrantType.REFRESH_TOKEN) // 允许刷新令牌
                    .redirectUri("http://localhost:8088/code") // 认证成功后的回调地址
                    .postLogoutRedirectUri("http://localhost:8088/") // 退出后的回调地址
                    .scope(OidcScopes.OPENID) // 启用 OpenID 作用域
                    .scope(OidcScopes.PROFILE) // 允许访问用户基本信息
                    .scope("myResource") // 自定义作用域
                    .clientSettings(ClientSettings.builder().requireAuthorizationConsent(true).build()) // 需要用户授权
                    .tokenSettings(TokenSettings.builder()
                            .accessTokenTimeToLive(Duration.ofMinutes(30)) // 设置访问令牌过期时间为 30 分钟
                            .refreshTokenTimeToLive(Duration.ofDays(1)) // 设置刷新令牌过期时间为 1 天
                            .build())
                    .build();

            RegisteredClient mobileClient = RegisteredClient.withId(UUID.randomUUID().toString())
                    .clientId("mobile-client") // 客户端 ID
                    .clientName("授权码+PKCE客户端")
                    .clientAuthenticationMethod(ClientAuthenticationMethod.NONE) // 认证方式
                    .authorizationGrantType(AuthorizationGrantType.AUTHORIZATION_CODE) // 授权码模式
                    .authorizationGrantType(AuthorizationGrantType.REFRESH_TOKEN) // 允许刷新令牌
                    .redirectUri("http://localhost:8088/code") // 认证成功后的回调地址
                    .postLogoutRedirectUri("http://localhost:8088/") // 退出后的回调地址
                    .scope(OidcScopes.OPENID) // 启用 OpenID 作用域
                    .scope(OidcScopes.PROFILE) // 允许访问用户基本信息
                    .clientSettings(
                            ClientSettings.builder()
                                    .requireAuthorizationConsent(true)
                                    .requireProofKey(true) // 关键配置:强制客户端使用 PKCE 进行授权
                                    .build()) // 需要用户授权
                    .tokenSettings(TokenSettings.builder()
                            .accessTokenTimeToLive(Duration.ofMinutes(30)) // 设置访问令牌过期时间为 30 分钟
                            .refreshTokenTimeToLive(Duration.ofDays(1)) // 设置刷新令牌过期时间为 1 天
                            .reuseRefreshTokens(true)
                            .idTokenSignatureAlgorithm(SignatureAlgorithm.RS256) // 设置 ID 令牌签名算法为 RS256
                            .accessTokenFormat(OAuth2TokenFormat.SELF_CONTAINED) // 设置访问令牌格式为 JWT
                            .build())
                    .build();

            RegisteredClient passwordClient = RegisteredClient.withId(UUID.randomUUID().toString())
                    .clientName("自定义密码模式客户端")
                    .clientId("password-client") // 客户端 ID
                    .clientSecret(passwordEncoder.encode("secret2")) // 客户端密钥(加密)
                    .clientAuthenticationMethod(ClientAuthenticationMethod.CLIENT_SECRET_BASIC) // 认证方式
                    .authorizationGrantType(new AuthorizationGrantType("password")) // 密码模式
                    .authorizationGrantType(AuthorizationGrantType.REFRESH_TOKEN) // 允许刷新令牌
                    .redirectUri("http://localhost:8088/code") // 认证成功后的回调地址
                    .postLogoutRedirectUri("http://localhost:8088/") // 退出后的回调地址
                    .scope(OidcScopes.OPENID) // 启用 OpenID 作用域
                    .scope(OidcScopes.PROFILE) // 允许访问用户基本信息
                    .clientSettings(ClientSettings.builder().requireAuthorizationConsent(true).build()) // 需要用户授权
                    .tokenSettings(TokenSettings.builder()
                            .accessTokenTimeToLive(Duration.ofMinutes(30)) // 设置访问令牌过期时间为 30 分钟
                            .refreshTokenTimeToLive(Duration.ofDays(1)) // 设置刷新令牌过期时间为 1 天
                            .reuseRefreshTokens(true)
                            .idTokenSignatureAlgorithm(SignatureAlgorithm.RS256) // 设置 ID 令牌签名算法为 RS256
                            .accessTokenFormat(OAuth2TokenFormat.SELF_CONTAINED) // 设置访问令牌格式为 JWT
                            .build())
                    .build();

            // 保存到数据库
            registeredClientRepository.save(oidcClient);
            registeredClientRepository.save(mobileClient);
            registeredClientRepository.save(passwordClient);
        }

        return registeredClientRepository;
    }
添加资源服务
上面有了认证服务,客户端(postman代替的),这里添加一个资源服务
1. pom.xml 添加依赖
        <dependency>
            <groupId>org.springframework.boot</groupId>
            <artifactId>spring-boot-starter-oauth2-resource-server</artifactId>
        </dependency>
        <dependency>
            <groupId>org.springframework.boot</groupId>
            <artifactId>spring-boot-starter-security</artifactId>
        </dependency>
        <dependency>
            <groupId>org.springframework.boot</groupId>
            <artifactId>spring-boot-starter-web</artifactId>
        </dependency>

        <dependency>
            <groupId>org.springframework.boot</groupId>
            <artifactId>spring-boot-starter-test</artifactId>
            <scope>test</scope>
        </dependency>
2. 配置application.properties 的issue地址(上面的认证服务的地址)
spring.application.name=ResourceServer
spring.security.oauth2.resourceserver.jwt.issuer-uri=http://localhost:8088/
3. 配置ResourceServerConfig。
import org.springframework.context.annotation.Bean;
import org.springframework.context.annotation.Configuration;
import org.springframework.security.config.annotation.web.builders.HttpSecurity;
import org.springframework.security.config.annotation.web.configuration.EnableWebSecurity;
import org.springframework.security.oauth2.server.resource.authentication.JwtAuthenticationConverter;
import org.springframework.security.oauth2.server.resource.authentication.JwtGrantedAuthoritiesConverter;
import org.springframework.security.web.SecurityFilterChain;

@Configuration
@EnableWebSecurity
public class ResourceServerConfig{

    @Bean
    protected SecurityFilterChain  configure(HttpSecurity http) throws Exception {

        http
                .authorizeHttpRequests((authorize) ->
                        authorize
                                .requestMatchers("/userinfo/**").hasAuthority("SCOPE_myResource")  // 只有具有该作用域的才能访问
                                .anyRequest().authenticated()
                )
                .oauth2ResourceServer(oauth2 -> oauth2
                        .jwt(jwt -> jwt
                                .jwtAuthenticationConverter(jwtAuthenticationConverter()) //自定义解析 scope 声明, 添加 SCOPE_ 前缀
                        )


                );
        return http.build();
    }

    // 自定义JWT解析逻辑(可选)
    private JwtAuthenticationConverter jwtAuthenticationConverter() {
        JwtGrantedAuthoritiesConverter grantedAuthoritiesConverter = new JwtGrantedAuthoritiesConverter();
        grantedAuthoritiesConverter.setAuthoritiesClaimName("scope"); // 从 scope 声明中获取权限
        grantedAuthoritiesConverter.setAuthorityPrefix("SCOPE_");

        JwtAuthenticationConverter jwtAuthenticationConverter = new JwtAuthenticationConverter();
        jwtAuthenticationConverter.setJwtGrantedAuthoritiesConverter(grantedAuthoritiesConverter);
        return jwtAuthenticationConverter;
    }
}
注意:这里可以配置资源服务的名称 SCOPE_myResource (scope_为jwtAuthenticationConverter 写入的前缀)。 myResource 也就是上面认证服务配置客户端的自定义作用域
 // 配置一个 OpenID Connect (OIDC) 客户端
        RegisteredClient oidcClient = RegisteredClient.withId(UUID.randomUUID().toString())
                .clientName("OIDC客户端")
                .clientId("oidc-client") // 客户端 ID
                //.clientSecret("{noop}secret") // 客户端密钥(未加密)
                .clientSecret(passwordEncoder().encode("secret")) // 客户端密钥(加密)
                .clientAuthenticationMethod(ClientAuthenticationMethod.CLIENT_SECRET_BASIC) // 认证方式
                .authorizationGrantType(AuthorizationGrantType.AUTHORIZATION_CODE) // 授权码模式
                .authorizationGrantType(AuthorizationGrantType.REFRESH_TOKEN) // 允许刷新令牌
                .redirectUri("http://localhost:8088/code") // 认证成功后的回调地址
                .postLogoutRedirectUri("http://localhost:8088/") // 退出后的回调地址
                .scope(OidcScopes.OPENID) // 启用 OpenID 作用域
                .scope(OidcScopes.PROFILE) // 允许访问用户基本信息
                .scope("myResource") // 自定义作用域
                .clientSettings(ClientSettings.builder().requireAuthorizationConsent(true).build()) // 需要用户授权
                .tokenSettings(TokenSettings.builder()
                        .accessTokenTimeToLive(Duration.ofMinutes(30)) // 设置访问令牌过期时间为 30 分钟
                        .refreshTokenTimeToLive(Duration.ofDays(1)) // 设置刷新令牌过期时间为 1 天
                        .build())
                .build();
4. 添加测试接口
import org.springframework.security.core.annotation.AuthenticationPrincipal;
import org.springframework.security.oauth2.jwt.Jwt;
import org.springframework.web.bind.annotation.GetMapping;
import org.springframework.web.bind.annotation.RestController;

@RestController
public class UserInfoController {

    @GetMapping("/userinfo")
    public String getUserInfo(@AuthenticationPrincipal Jwt jwt) {
        System.out.println(jwt.getClaims());
        String username = jwt.getSubject();
        return "Current user: " + username;
    }
}
5. 用上面授权码模式获取到的token测试一下

这里可以授权成功,下面用自定义密码模式拿到的token请求一下
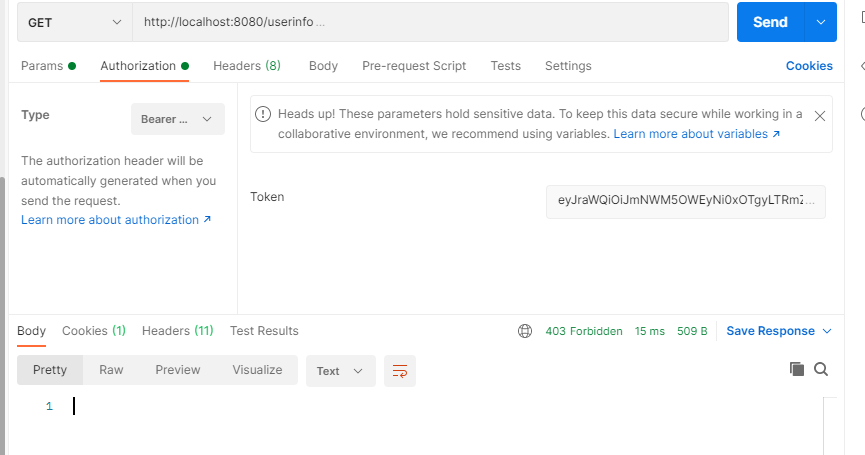
这里可以看到提示403,因为授权码模式的 oidc-client 才包含了 .scope("myResource") 自定义作用域,才能够成功访问。 而自定义密码模式没有包含,所以没有权限访问

 浙公网安备 33010602011771号