
鸿蒙学习实战之路:HarmonyOS Grid 网格元素拖拽交换实现
HarmonyOS Grid 网格元素拖拽交换实现
官方文档永远是你的好伙伴,请收藏!
华为开发者联盟 - Grid 组件参考文档
华为开发者联盟 - GridItem 组件参考文档
关于本文
本文主要介绍在 HarmonyOS 中如何实现 Grid 网格元素的拖拽交换功能,包含相同大小和不同大小网格元素的实现方法
- 本文并不能代替官方文档,所有内容基于官方文档+实践记录
- 所有代码示例都有详细注释,建议自己动手尝试
- 基本所有关键功能都会附上对应的文档链接,强烈建议你点看看看
概述
Grid 网格元素拖拽交换功能在应用中经常会被使用,比如编辑九宫格图片时需要拖拽图片改变排序。当网格中图片进行拖拽交换时,元素排列会跟随图片拖拽的位置而变化,并有对应的动画效果,提供良好的用户体验。
先来看看最终效果:

实现原理
关键技术
Grid 网格元素拖拽交换功能主要通过三个部分实现:
- Grid 容器组件 - 用来构建网格布局
- 组合手势 - 实现元素的拖拽操作
- animateTo 动画 - 提供流畅的视觉效果
重要提醒!
Grid 组件的支持 animation 功能有一些限制:
- 必须设置 supportAnimation 为 true
- 仅在滚动模式下(设置 rowsTemplate 或 columnsTemplate)支持
- 只在大小规则的 Grid 中支持拖拽动画,跨行或跨列场景不支持
- 跨行跨列场景需要自定义 Grid 布局、手势和动画
开发流程
实现拖拽交换的基本步骤:
- 实现 Grid 布局,设置 editMode=true 开启编辑模式
- 给 GridItem 组件绑定长按、拖拽等手势
- 使用 animateTo 添加动画效果
华为开发者联盟 - 组合手势参考文档
华为开发者联盟 - animateTo 参考文档
相同大小网格元素,长按拖拽
场景描述
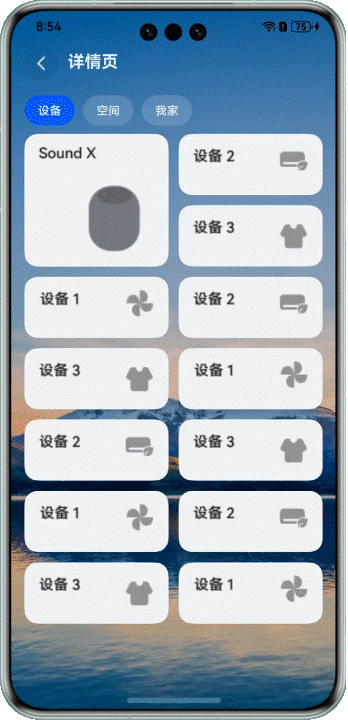
最常见的场景就是编辑九宫格图片,长按图片可以拖拽交换排序,拖拽时旁边的图片会即时移动,形成新的布局。
看看实际效果:

开发步骤
1. 创建 Grid 布局
首先创建一个基本的 Grid 布局,包含相同大小的 GridItem:
Grid() {
  // 使用ForEach遍历数据生成GridItem
  ForEach(this.numbers, (item: number) => {
    GridItem() {
      Image($r(`app.media.image${item}`)) // 根据item加载对应的图片资源
        .width('100%') // 宽度占满GridItem
        .height(this.curBp === 'md' ? 131 : 105) // 根据屏幕尺寸设置高度
        .draggable(false) // 禁止图片自身的拖拽
        .animation({ curve: Curve.Sharp, duration: 300 }) // 设置动画效果
    }
  }, (item: number) => item.toString()) // 设置唯一的key值
}
.width(this.curBp === 'md' ? '66%' : '100%') // 根据屏幕尺寸设置宽度
.scrollBar(BarState.Off) // 不显示滚动条
.columnsTemplate('1fr 1fr 1fr') // 设置为3列布局
.columnsGap(this.curBp === 'md' ? 6 : 4) // 设置列间距
.rowsGap(this.curBp === 'md' ? 6 : 4) // 设置行间距
.height(this.curBp === 'md' ? 406 : 323) // 根据屏幕尺寸设置高度
2. 开启编辑模式和动画
给 Grid 组件添加两个重要属性:
.editMode(true) // 开启编辑模式,允许拖拽
.supportAnimation(true) // 开启动画效果
3. 实现数组交换逻辑
定义一个函数来处理数组元素交换:
changeIndex(index1: number, index2: number) {
  // 从数组中删除第一个索引的元素,并返回被删除的元素
  let tmp = this.numbers.splice(index1, 1);
  // 在第二个索引位置插入被删除的元素
  this.numbers.splice(index2, 0, tmp[0])
}
4. 绑定拖拽事件
给 Grid 组件绑定拖拽相关的事件:
// 拖拽开始时触发
.onItemDragStart((_, itemIndex: number) => {
  // 记录当前拖拽的图片编号
  this.imageNum = this.numbers[itemIndex];
  // 返回拖拽时显示的像素图
  return this.pixelMapBuilder();
})
// 拖拽结束时触发
.onItemDrop((_, itemIndex: number, insertIndex: number, isSuccess: boolean) => {
  // 检查拖拽是否成功,并且插入索引是否有效
  if (!isSuccess || insertIndex >= this.numbers.length) {
    return;
  }
  // 执行数组元素交换
  this.changeIndex(itemIndex, insertIndex);
})

// pixelMapBuilder()方法用于创建拖拽时显示的图片
## 不同大小网格元素,长按拖拽
### 场景描述
在展示设备等场景中,我们经常需要混合使用不同大小的网格元素。这时候拖拽交换就会更复杂一些。
看看效果:
> 注意:当前方案仅适用于页面包含一个较大网格元素的布局
### 开发步骤
#### 1. 创建Grid布局
首先创建一个包含不同大小GridItem的Grid布局:
```typescript
Grid() {
ForEach(this.numbers, (item: number) => {
GridItem() {
Stack({ alignContent: Alignment.TopEnd }) {
Image(this.changeImage(item))
.width('100%')
.borderRadius(16)
.objectFit(this.curBp === 'md' ? ImageFit.Fill : ImageFit.Cover)
.draggable(false)
.animation({ curve: Curve.Sharp, duration: 300 })
}
}
.rowStart(0)
.rowEnd(this.getRowEnd(item)) // 根据item决定元素占据的行数
.scale({ x: this.scaleItem === item ? 1.02 : 1, y: this.scaleItem === item ? 1.02 : 1 }) // 拖拽时放大效果
.zIndex(this.dragItem === item ? 1 : 0) // 拖拽元素置于顶层
.translate(this.dragItem === item ? { x: this.offsetX, y: this.offsetY } : { x: 0, y: 0 }) // 拖拽位移
.hitTestBehavior(this.isDraggable(this.numbers.indexOf(item)) ? HitTestMode.Default : HitTestMode.None) // 控制点击行为
// ...
}, (item: number) => item.toString())
}
.width('100%')
.height('100%')
.editMode(true)
.scrollBar(BarState.Off)
.columnsTemplate('1fr 1fr') // 2列布局
.supportAnimation(true)
.columnsGap(12)
.rowsGap(12)
.enableScrollInteraction(true)
2. 定义元素移动相关计算函数
实现元素交换重新排序的核心逻辑:
itemMove(index: number, newIndex: number): void {
  if (!this.isDraggable(newIndex)) {
    return;
  }
  let tmp = this.numbers.splice(index, 1);
  this.numbers.splice(newIndex, 0, tmp[0]);
  this.bigItemIndex = this.numbers.findIndex((item) => item === 0);
}

isInLeft(index: number) {
  if (index === this.bigItemIndex) {
    return index % 2 == 0;
  }
  if (this.bigItemIndex % 2 === 0) {
    if (index - this.bigItemIndex === 2 || index - this.bigItemIndex === 1) {
      return false;
    }
  } else {
    if (index - this.bigItemIndex === 1) {
      return false;
    }
  }
  if (index > this.bigItemIndex) {
    return index % 2 == 1;
  } else {
    return index % 2 == 0;
  }
}

// 上下左右移动的方法
down(index: number): void {
  if ([this.numbers.length - 1, this.numbers.length - 2].includes(index)) {
    return;
  }
  if (this.bigItemIndex - index === 1) {
    return;
  }
  if ([14, 15].includes(this.bigItemIndex) && this.bigItemIndex === index) {
    return;
  }
  this.offsetY -= this.FIX_VP_Y;
  this.dragRefOffSetY += this.FIX_VP_Y;
  if (index - 1 === this.bigItemIndex) {
    this.itemMove(index, index + 1);
  } else {
    this.itemMove(index, index + 2);
  }
}

up(index: number): void {
  if (!this.isDraggable(index - 2)) {
    return;
  }
  if (index - this.bigItemIndex === 3) {
    return;
  }
  this.offsetY += this.FIX_VP_Y;
  this.dragRefOffSetY -= this.FIX_VP_Y;
  if (this.bigItemIndex === index) {
    this.itemMove(index, index - 2);
  } else {
    if (index - 2 === this.bigItemIndex) {
      this.itemMove(index, index - 1);
    } else {
      this.itemMove(index, index - 2);
    }
  }
}

left(index: number): void {
  if (this.bigItemIndex % 2 === 0) {
    if (index - this.bigItemIndex === 2) {
      return;
    }
  }
  if (this.isInLeft(index)) {
    return;
  }
  if (!this.isDraggable(index - 1)) {
    return;
  }
  this.offsetX += this.FIX_VP_X;
  this.dragRefOffSetX -= this.FIX_VP_X;
  this.itemMove(index, index - 1)
}

right(index: number): void {
  if (this.bigItemIndex % 2 === 1) {
    if (index - this.bigItemIndex === 1) {
      return;
    }
  }
  if (!this.isInLeft(index)) {
    return;
  }
  if (!this.isDraggable(index + 1)) {
    return;
  }
  this.offsetX -= this.FIX_VP_X;
  this.dragRefOffSetX += this.FIX_VP_X;
  this.itemMove(index, index + 1)
}

isDraggable(index: number): boolean {
  return index >= 0;
}
3. 绑定组合手势
给 GridItem 绑定长按和拖拽手势,并设置显式动画:
注意事项
开发时一定要注意这些细节!
-
Grid 拖拽基础设置:
- editMode 必须设置为 true 才能启用拖拽
- supportAnimation 设置为 true 才能有动画效果
- 内置动画仅支持大小规则的网格
-
不规则网格的特殊处理:
- 跨行跨列场景需要自定义实现
- 要特别注意元素位置关系的计算
- 大元素会影响周围小元素的排列,需要特殊处理
-
性能优化:
- 拖拽过程中的计算要尽量高效
- 避免不必要的重排重绘
- 动画持续时间不宜过长
总结
通过本文的学习,我们掌握了在 HarmonyOS 中实现 Grid 网格元素拖拽交换的方法:
-
基础实现:
- 使用 Grid 和 GridItem 构建布局
- 设置 editMode 和 supportAnimation 属性
- 实现数组交换逻辑
- 绑定拖拽事件
-
进阶实现:
- 处理不同大小元素的布局
- 实现复杂的位置计算和移动逻辑
- 自定义手势和动画效果
Grid 网格拖拽交换是提升用户体验的重要功能,合理使用可以让你的应用交互更加直观和友好。
再次提醒:官方文档是最好的学习资源!

 浙公网安备 33010602011771号